
There is a new feature available in Azure. It’s currently in public preview and it was announced in the end of July (https://azure.microsoft.com/en-us/updates/public-preview-vnet-peering-for-azure-virtual-network/). It’s called VNet Peering and it allows you to connect two azure virtual networks in the same region. You can even connect a classic virtual network with a resource manager virtual network. The configuration of the peering is available in the new portal.
This is really awesome because it helps us to connect a resource manager virtual machine with the Azure active directory domain services. I already blogged about configuring the domain services (Configure Azure Active Directory Domain Services) and stated, that this works only with classic virtual networks. This could be an issue if we create all virtual machines in the resource manager mode. So let’s have a look on vnet peering and how to work with it:
Enable preview feature
Update 2016/09/28: VNet peering is now general public available, so you can skip that step!
The first step is to open the new portal (https://portal.azure.com/), select a virtual network and check the settings. There is a new option available called “Peerings”. When we select it, then we can see that we have to request that feature – so that’s the first step.
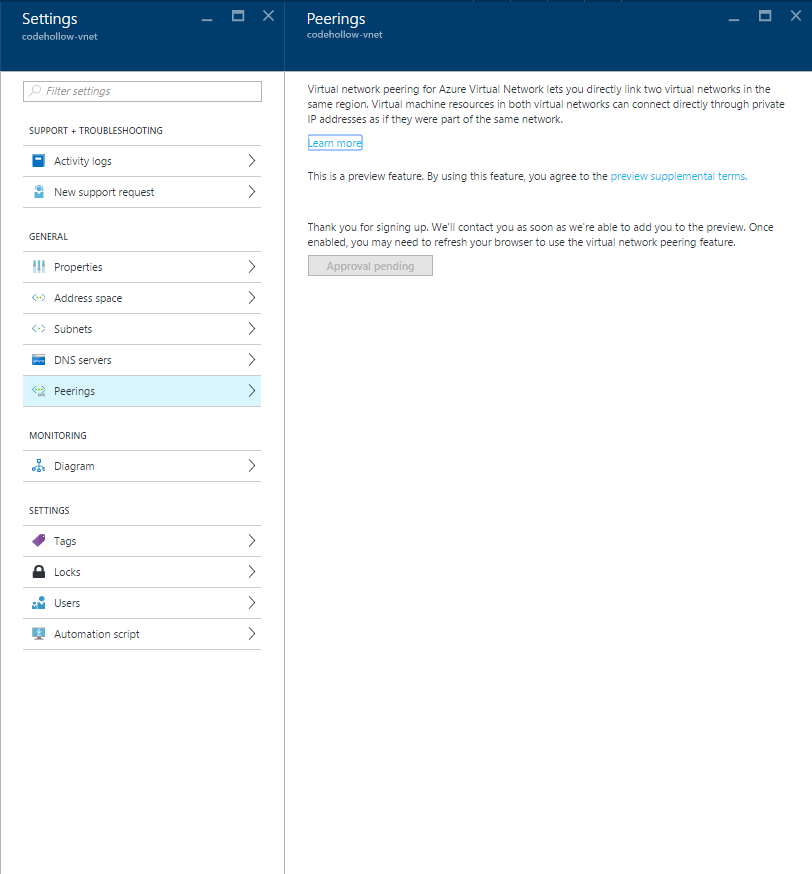
It takes about one or two days till it is available. I have not received an email that it’s available for me – I just checked it one day after the request and it was available.
Connect two Azure virtual networks via VNet Peering
Once we are allowed to use the peering, we can see the following screen:
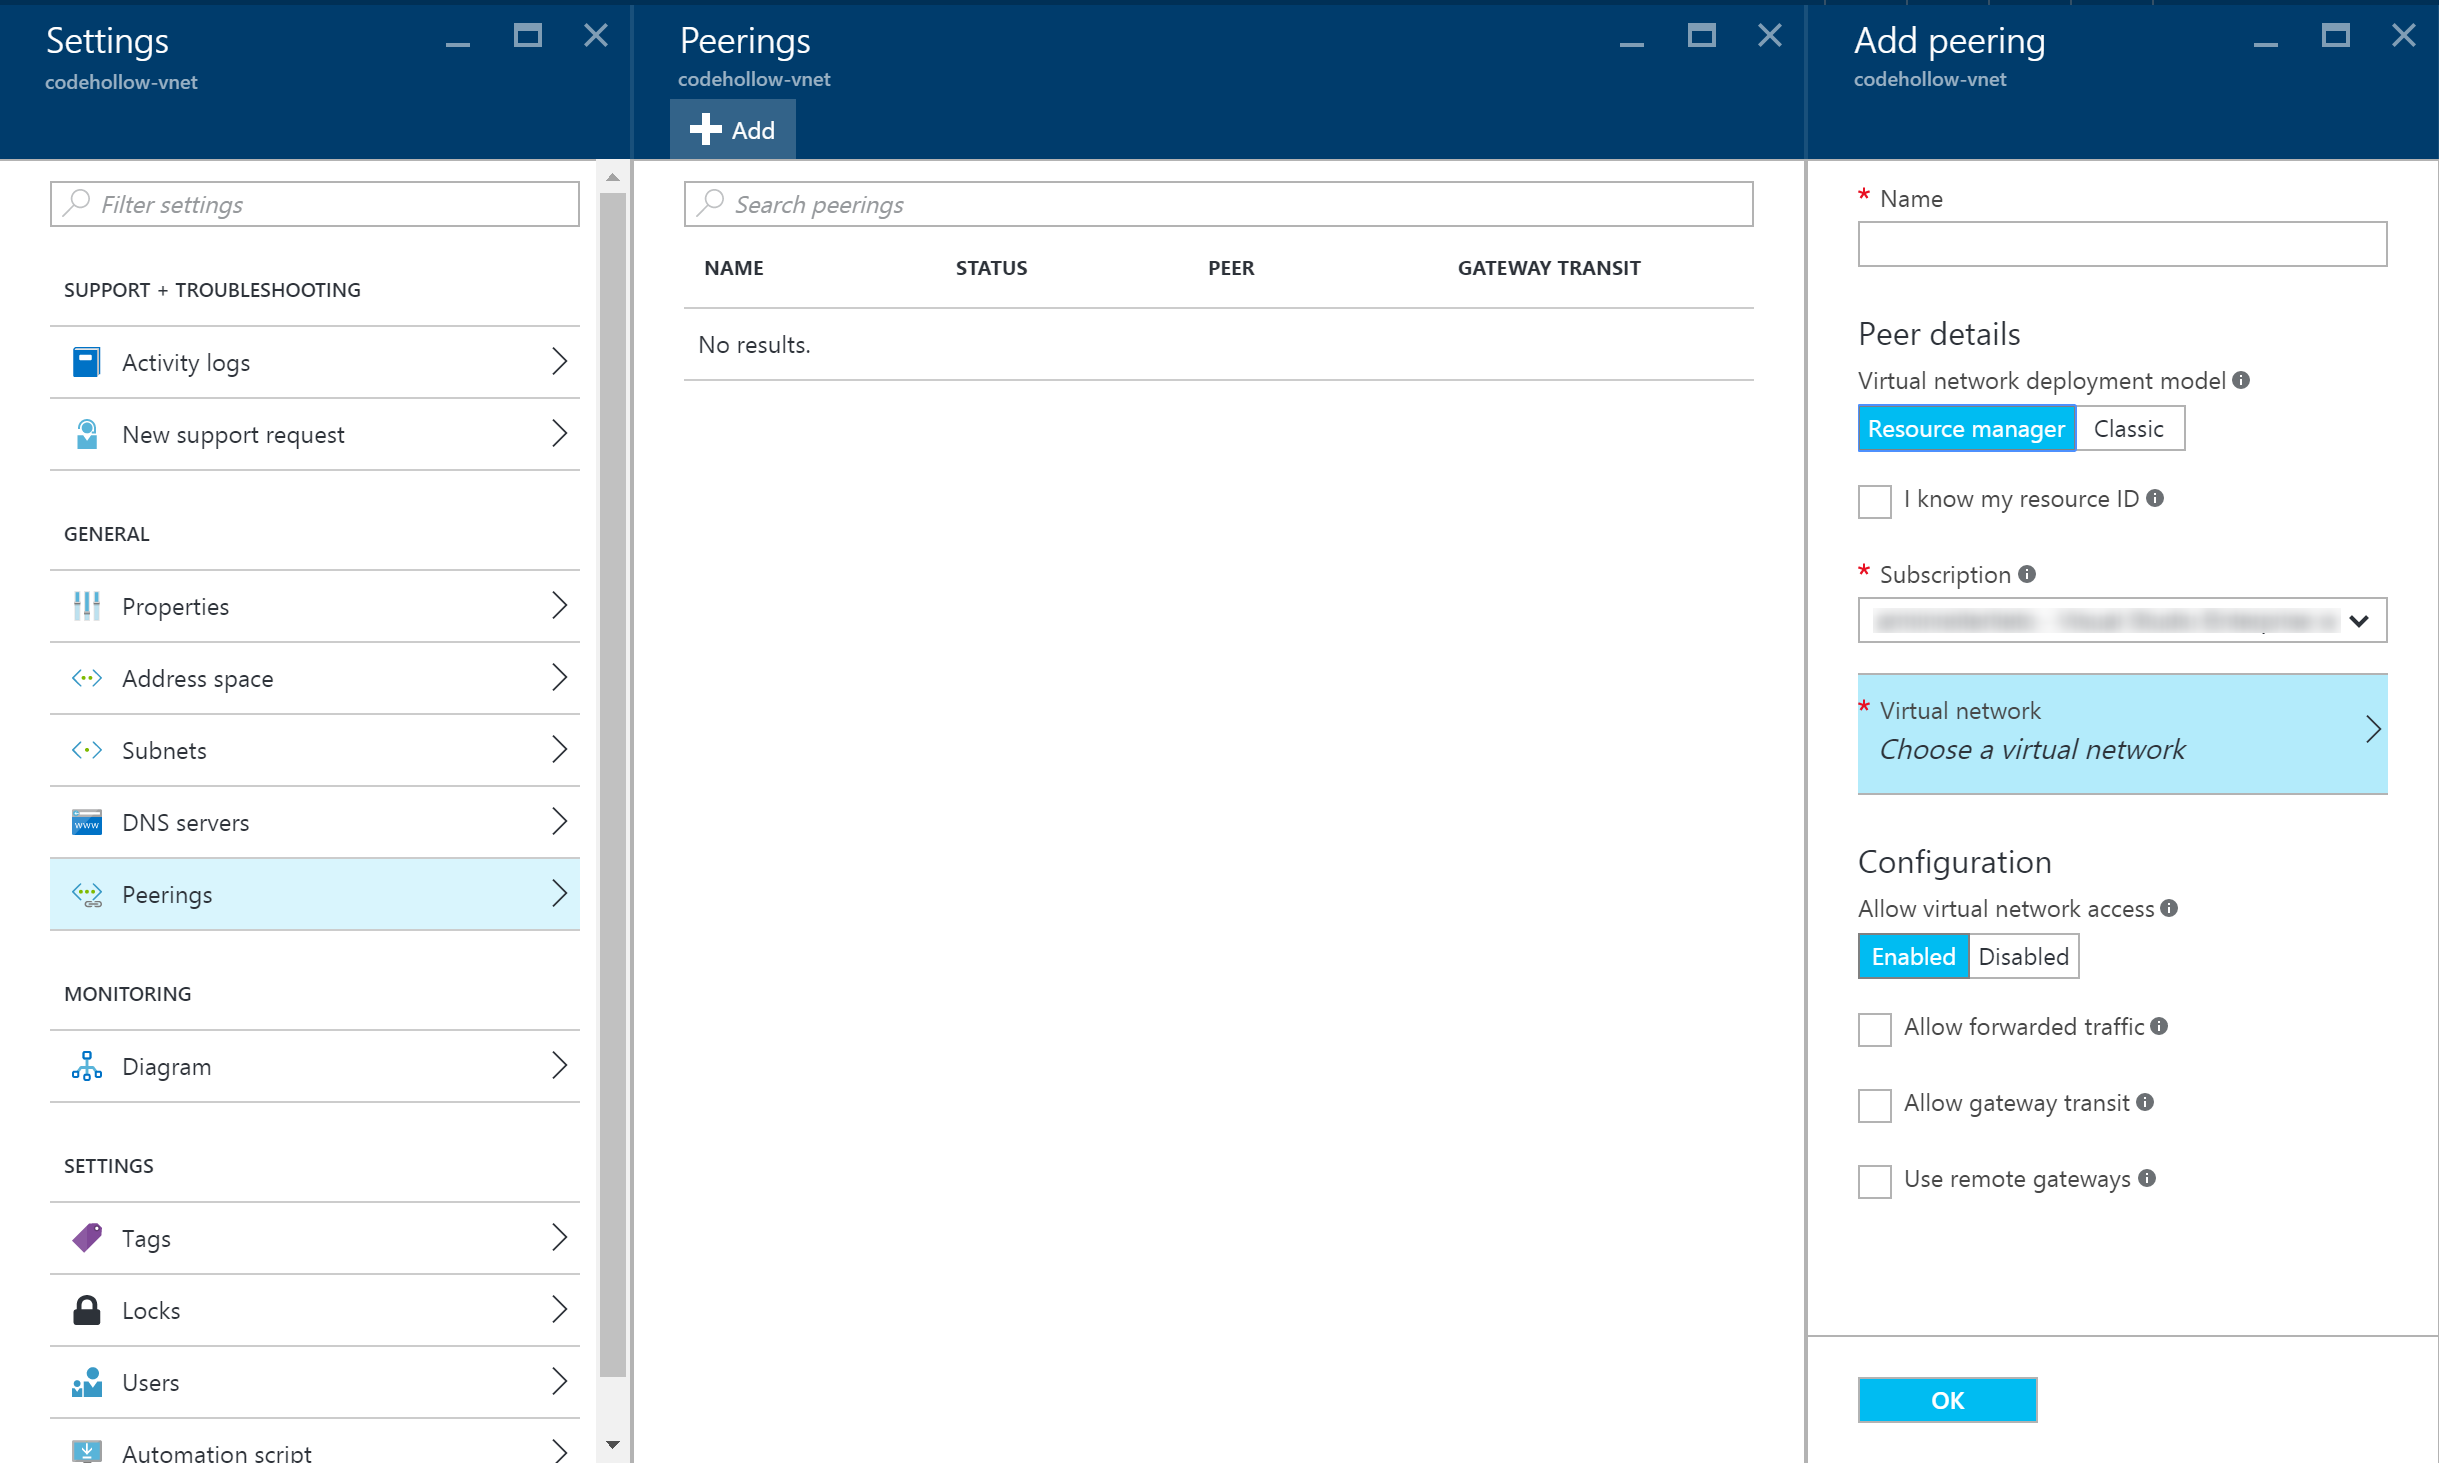
We can add a new peering by simply clicking the add button. Before adding the peering, please be aware that the address spaces of the virtual networks are not overlapping. I used the following vnet configuration in my sample:
- codehollow-ad-vnet (classic vnet): 10.1.0.0/16
- Default subnet: 10.1.0.0/24
- codehollow-vnet (resource manager vnet): 10.2.0.0/16
- Default subnet: 10.2.0.0/24
- Internal subnet: 10.2.1.0/24
- GatewaySubnet: 10.2.2.0/24
I already stated it is important that both virtual networks are in the same region! My virtual networks are both located in north europe. If one is in west europe and the other one is in north europe, then the peering will fail. You can enter the resource id manually and click on create, but the creation process will throw an error. If you want to connect virtual networks from different regions, you have to use vpn gateways for it.
Back to the creation: Give the peering a good name and select the virtual network deployment model. For a peering between a resource manager vnet and a classic vnet, select “Classic”. With a click on “Choose a virtual network” you should see your networks.
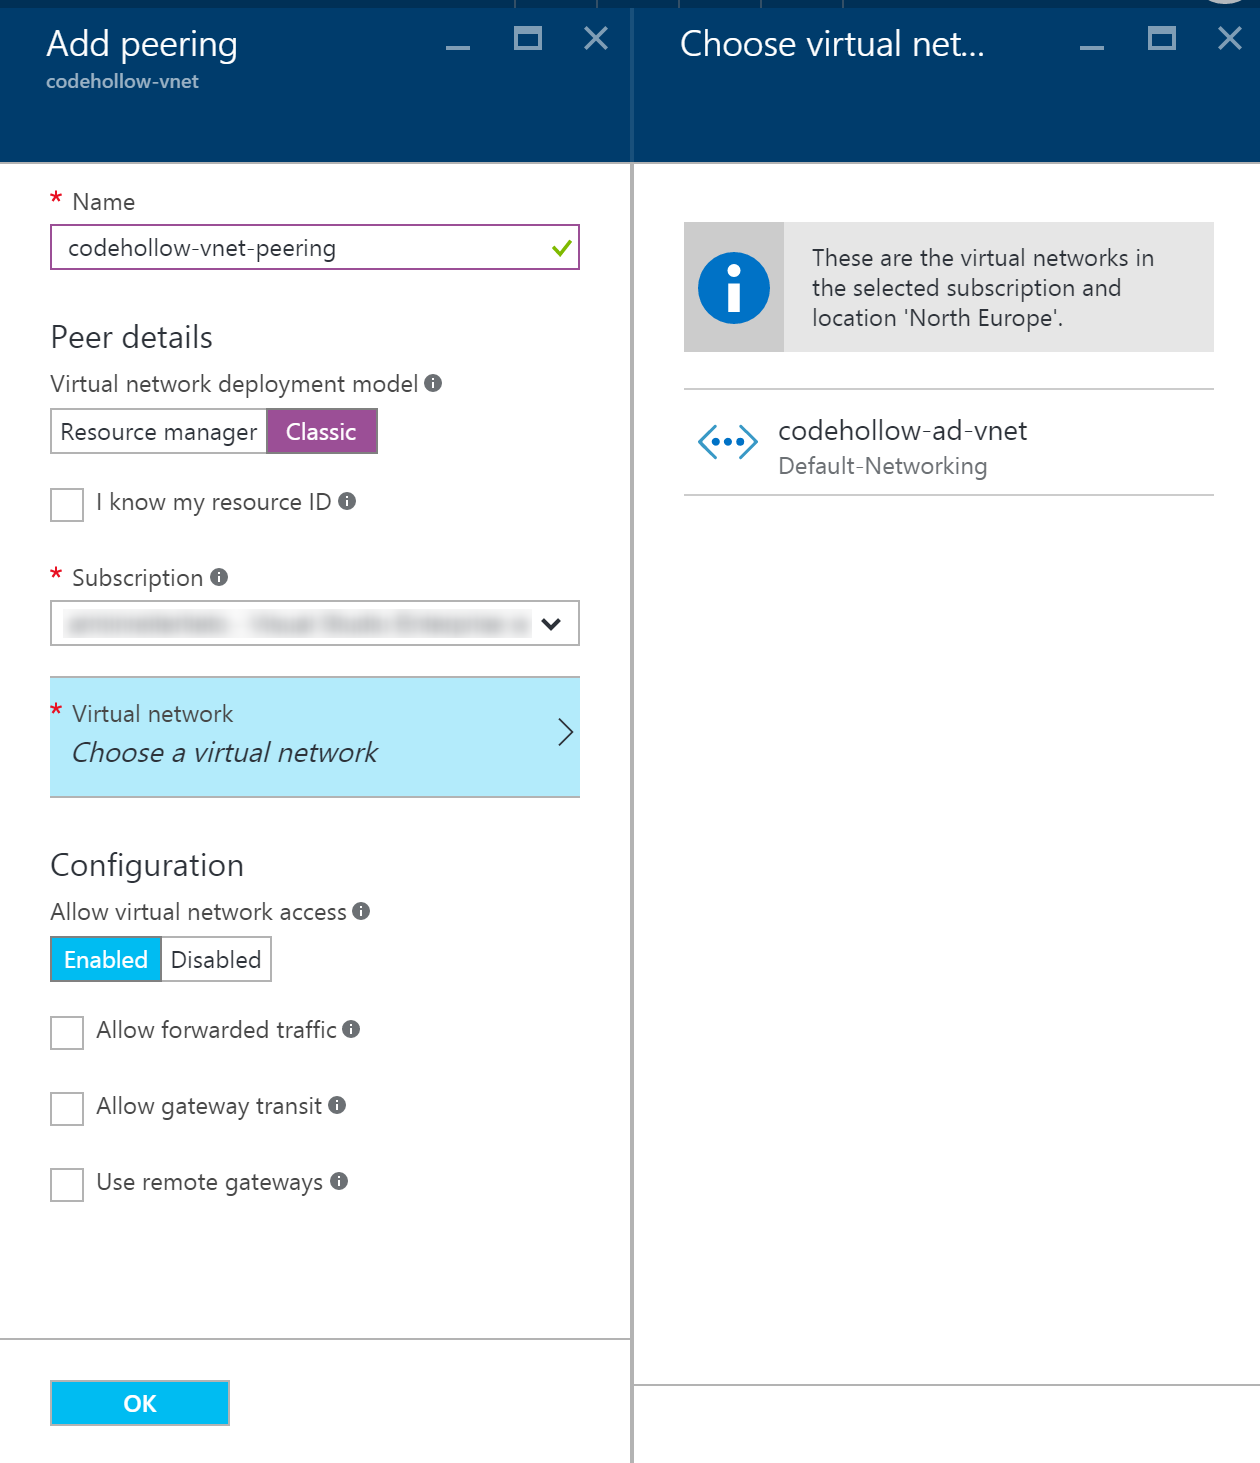
If you don’t see the other virtual network, then there is a big chance that it is e.g. in another region or another subscription. If everythings correct and you don’t see it, then you can try to enter the resource ID manually. (see below).
After selecting the network you can configure to not allow virtual network access etc.. You can find a description for those parameters in the info box or in one of the links below in “Additional information”.
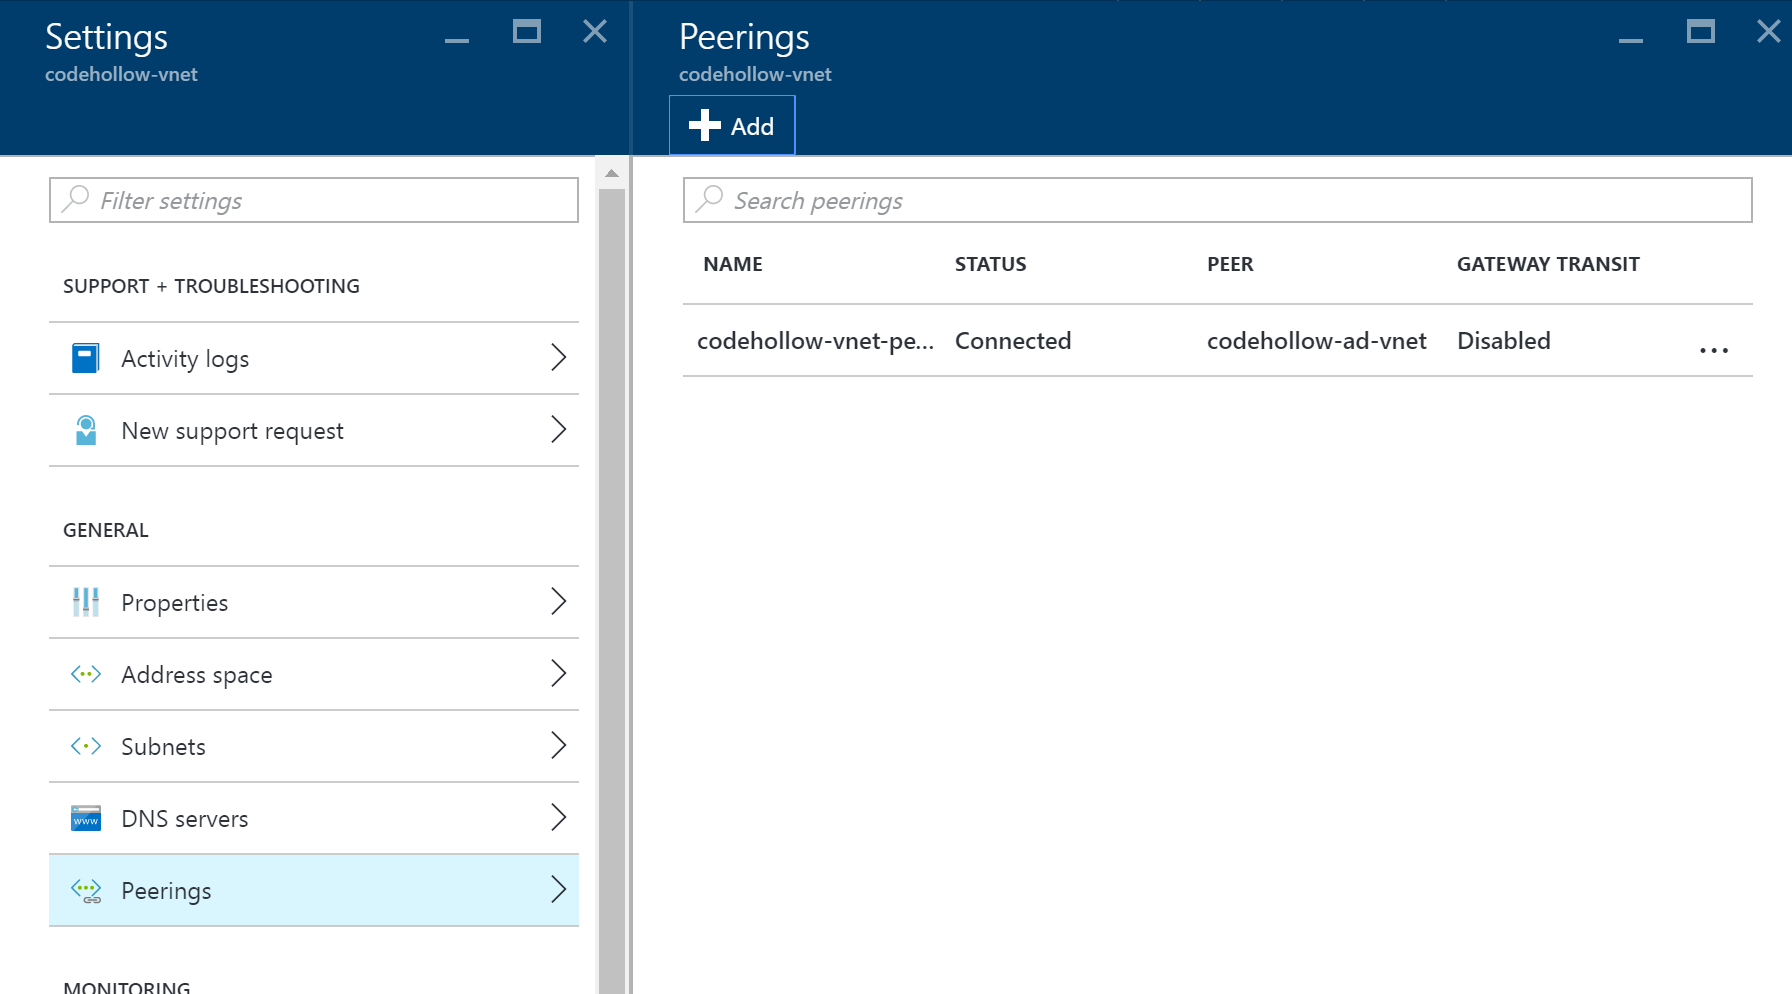
When we press ok and everythings fine, we can see the vnet peering:
How to get the resource ID of a vnet?
You can use the powershell to get the resource ID or you use the export script that I created (Export Azure Resources via Powershell to CSV). I used the script to export my resources, looked for the virtual network and copied the resource ID from there. The resource ID looks like:
“/subscriptions/[subscriptionId]/resourceGroups/Default-Networking/providers/Microsoft.ClassicNetwork/virtualNetworks/[ClassicVNetName]”
If you want to use PowerShell to find the resource ID, use the following command:
Get-AzureRmResource
Probably you need to sign in to azure and select the right subscription. Please check my blog entry about Export Azure Resources via Powershell to CSV.
Join a VM to the Azure active directory domain services
I already described how to configure the active directory domain services and how to join a virtual machine to the domain in this blog post: Configure Azure Active Directory Domain Services.
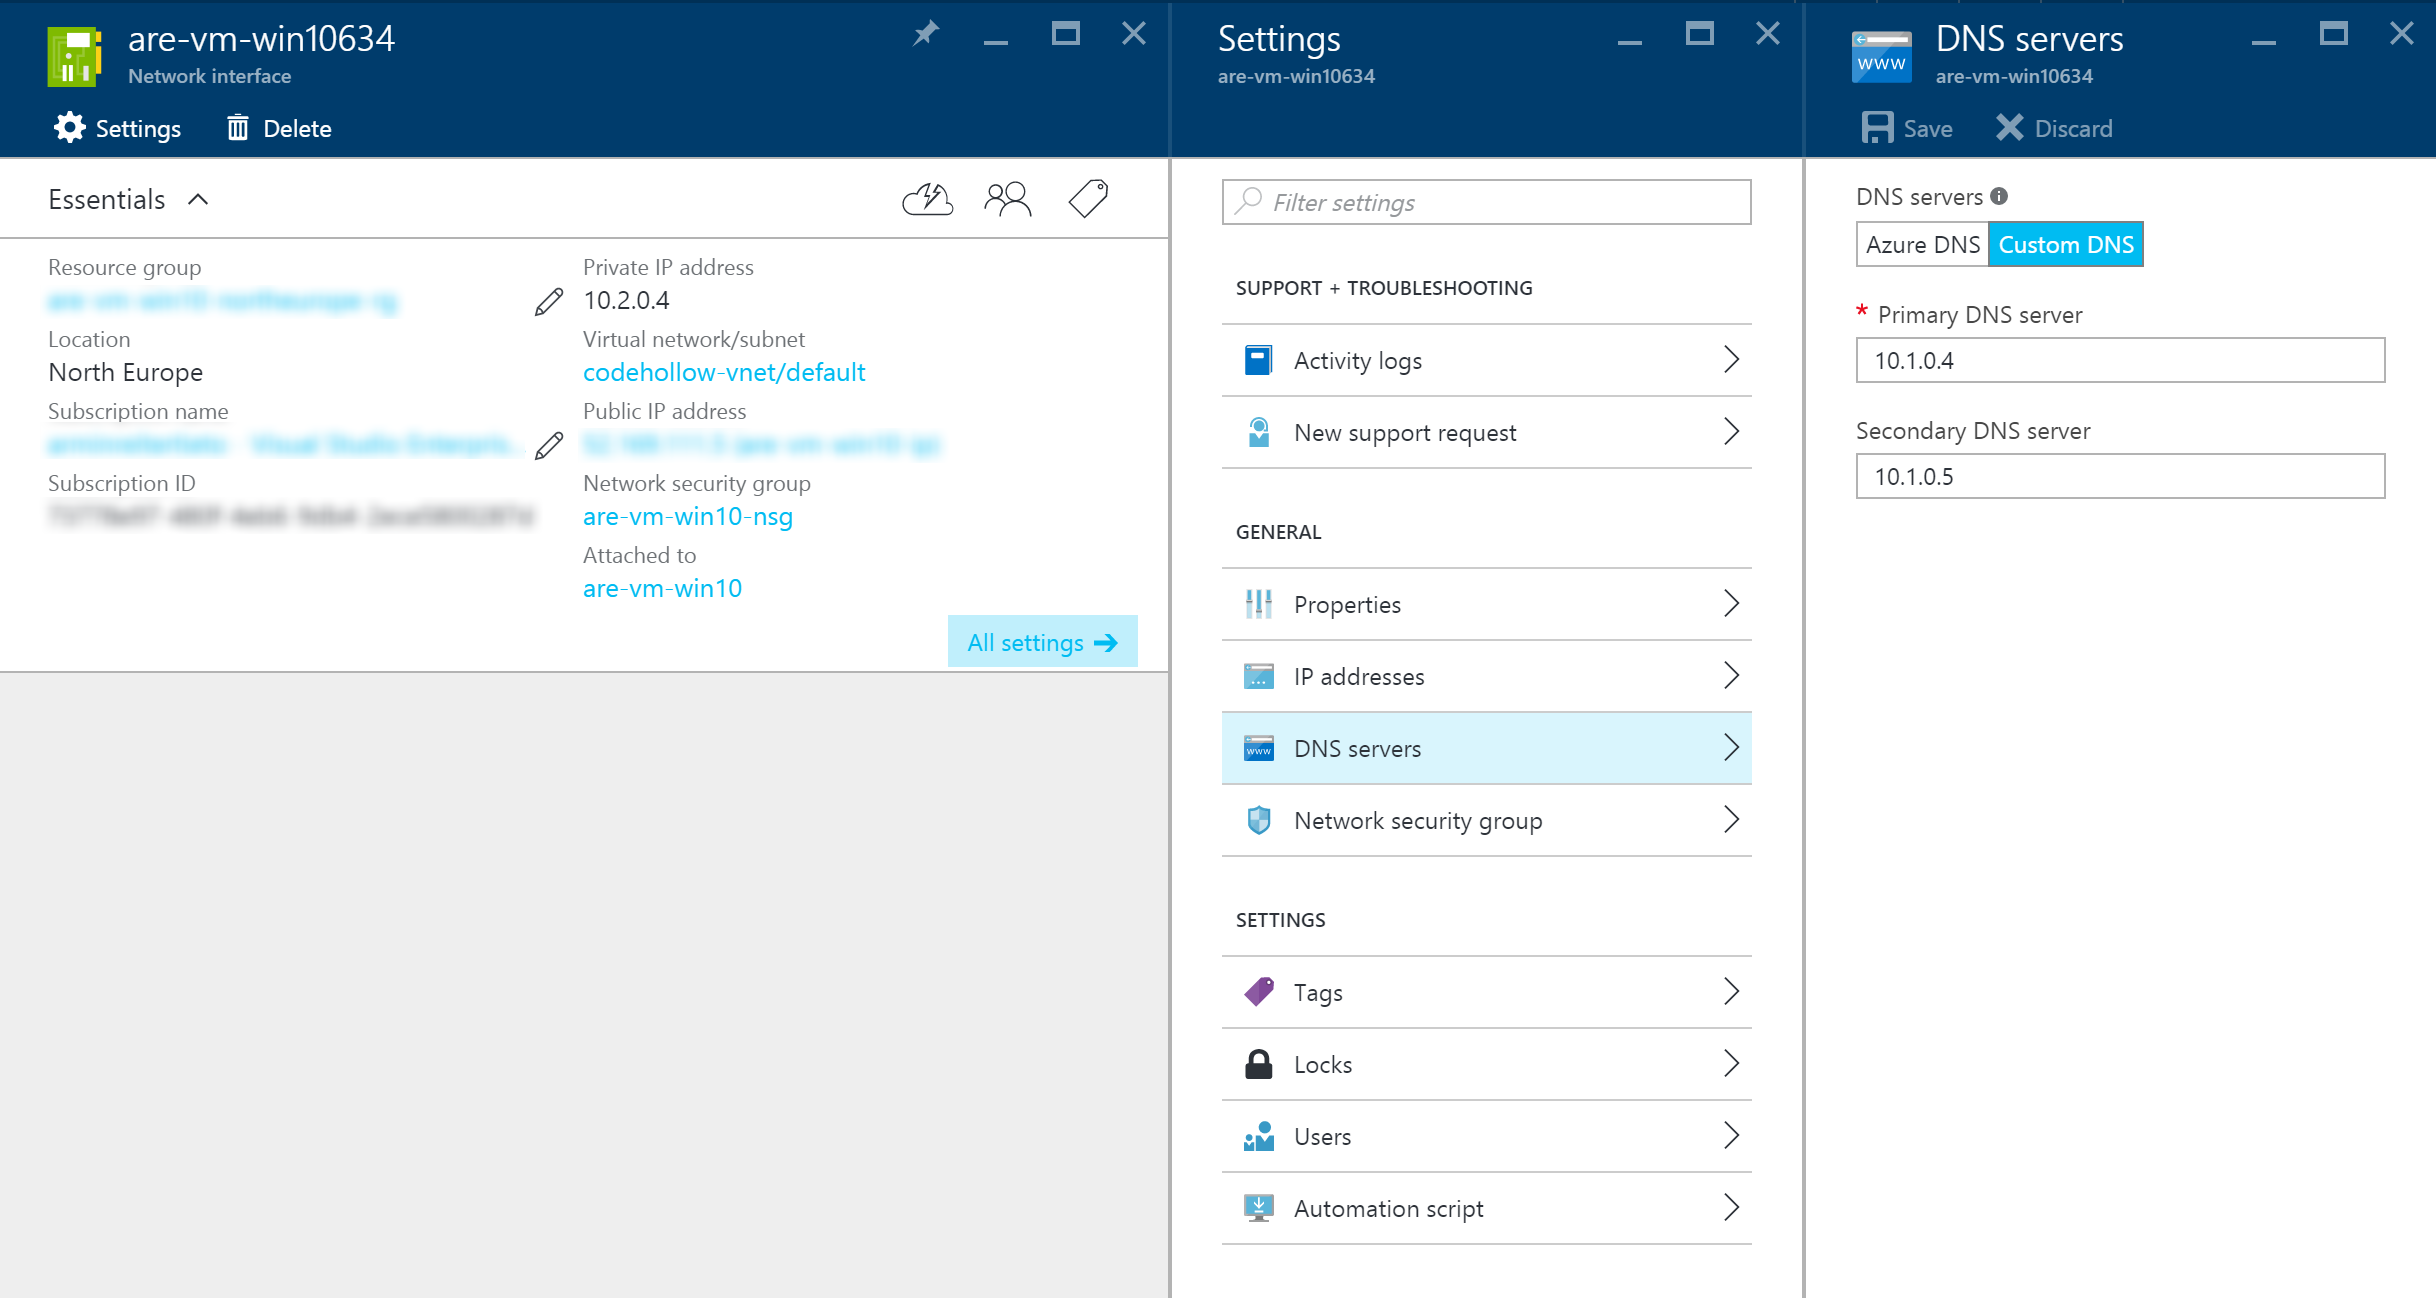
But you will probably not be able to join the domain (step 6) and instead receive the error: “That domain couldn’t be found. Check the domain name and try again.“. That’s because the VM does not find your domain (e.g. codehollow.onmicrosoft.com). To fix that, you have to configure the DNS server at first. You can do this for your resource manager virtual network or directly for the network interface of your virtual machine. I chose the second way because the first one was not possible for me, because the names of the networks were too long (Error: Resource name codehollow-ad-vnet.codehollow-vnet.[ID].[ID] is invalid. The name can be up to 80 characters long. It must begin with a word character, and it must end with a word character or with ‘_’. The name may contain word characters or ‘.’, ‘-‘, ‘_’.). I guess this is an issue in the preview version, because it automatically adds the guids of the virtual networks and the result is that the name is longer than 80 characters :(.
Therefore we open the network interface of our virtual machine, select DNS and configure the dns settings that are configured for our active directory domain services (part of step 4 in Configure Azure Active Directory Domain Services). Note: I created a new network for the domain services and therefore the IP in the screenshot below is different from the one in my previous blog post:
After that you should restart your virtual machine and then you should be able to add the virtual machine to the active directory domain services.
Additional information
VNet peering: https://azure.microsoft.com/en-us/documentation/articles/virtual-network-peering-overview/
Create a virtual network peering using the Azure portal: https://azure.microsoft.com/en-in/documentation/articles/virtual-networks-create-vnetpeering-arm-portal/


Comments are closed