
The Azure active directory domain services are currently in preview, but you can already use it to connect your virtual machines to it. One of the main limitations right now is, that it works only with the classic deployment model. You can only use a virtual network that is created in the classic mode and also the virtual machine that should be connected to the AD must part of this virtual network. As the network is in classic mode, the virtual machine also needs to be created in classic mode. But let’s start to find out, what the Azure active directory domain services are.
What is it and why should I use it?
If you want to connect your virtual machines in Azure to an active directory, then there are two possible ways. The first is, to connect them to your local AD domain controller via a private connection (ExpressRoute, VPN). The second is to setup the domain controller in Azure. As both options are possibly not the best, Microsoft created the active directory domain services. You can use them if you don’t want to setup a domain controller in Azure and you also don’t want to build a private connection to your company. If you want, you can still use your local domain controller or setup the sync, but it’s not required anymore. Another scenario is, that you have a cloud only company and you need an active directory for some specific services. In that cases, it’s cool and easy to use the domain services from Azure.
Sounds good for me, so I really wanted to give it a try. There is a very good tutorial available by Microsoft how to set it up: https://azure.microsoft.com/en-us/documentation/articles/active-directory-ds-getting-started/
In this blog post I’ll shortly describe what I did, so that it worked for me.
Step 1: Create the “AAD DC Administrators” group
Navigate to your Azure Active directory in the classic portal (https://manage.windowsazure.com) and add a group with the name “AAD DC Administrators”. The group must have exact the mentioned name.
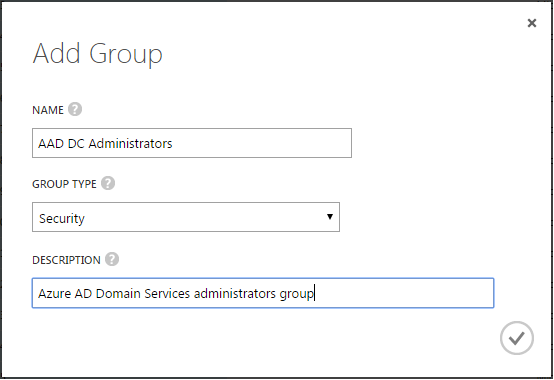
When the group is successfully added, start to add your users to it.
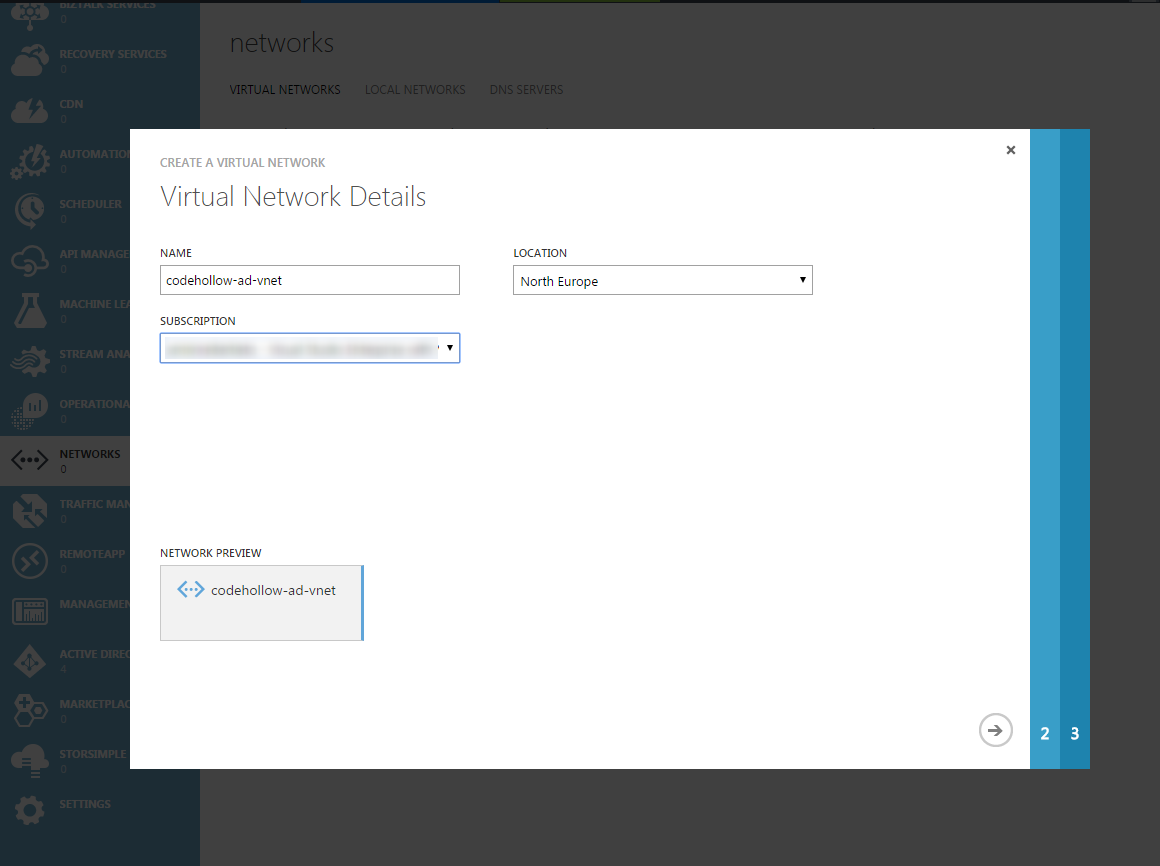
Step 2: Configure virtual network
I created a simple, standard virtual network. There are some requirements for the virtual network, one is that the AD domain services currently only support classic virtual networks and no resource manager (ARM) virtual networks. Therefore, I decided to create a standard virtual network in the classic portal. I set the location to North Europe and gave it a name. For the rest, I used the default configuration that the portal provided me.
If you need more information about the requirements. please find more details in the link in the additional information section.


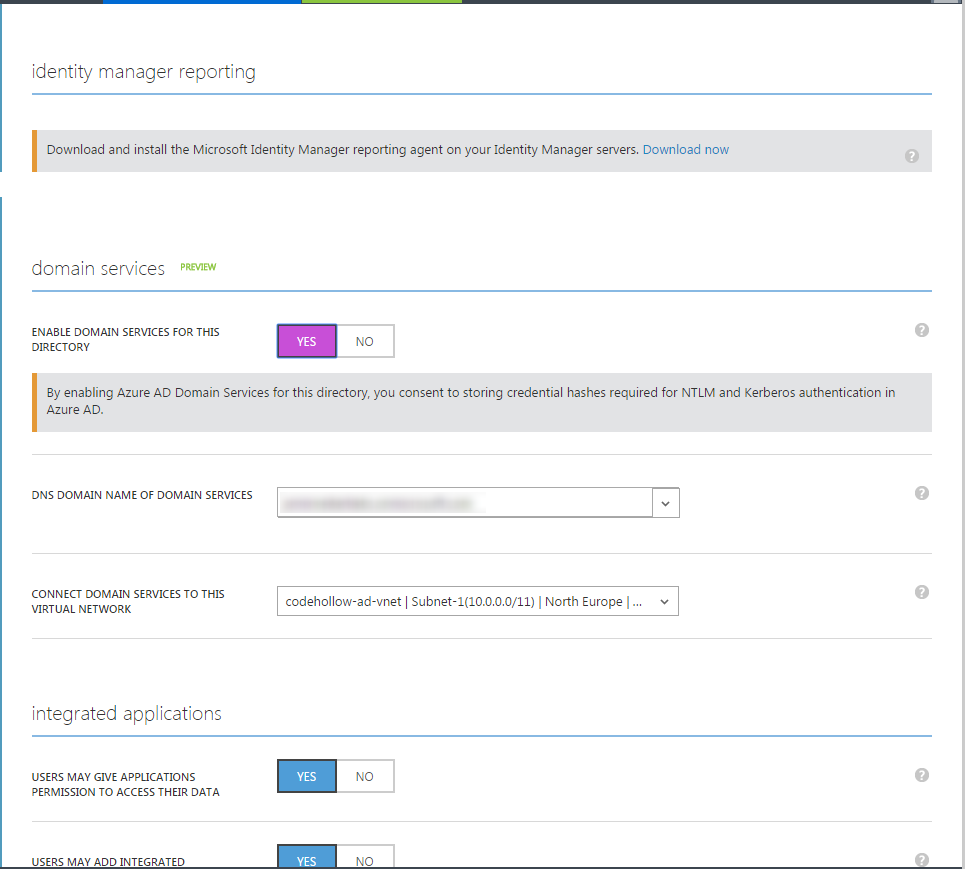
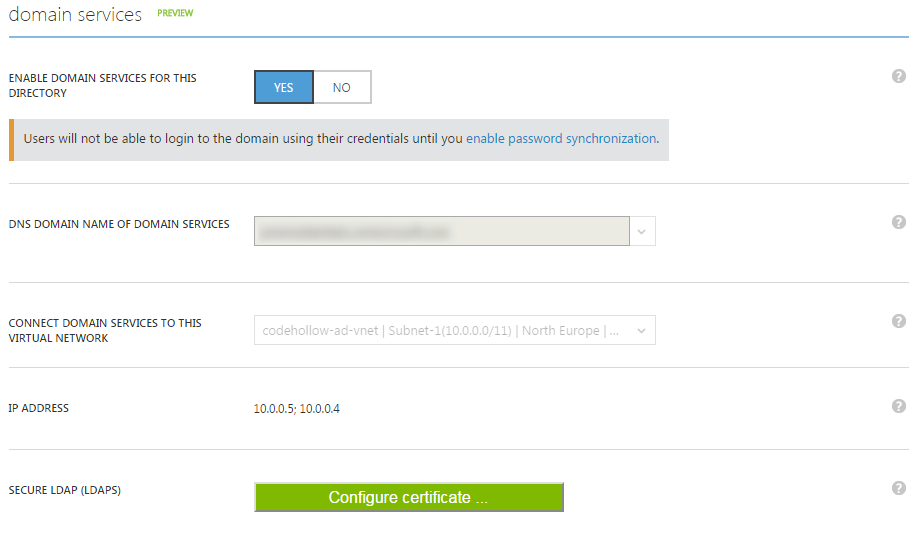
Step 3: Enable Azure AD Domain Services
Go to “configure” of your Azure Active Directory, scroll down and select “Enable domain services for this directory”
Now you need to wait for about 20-30 minutes. After that you will see an IP Address in the domain services section: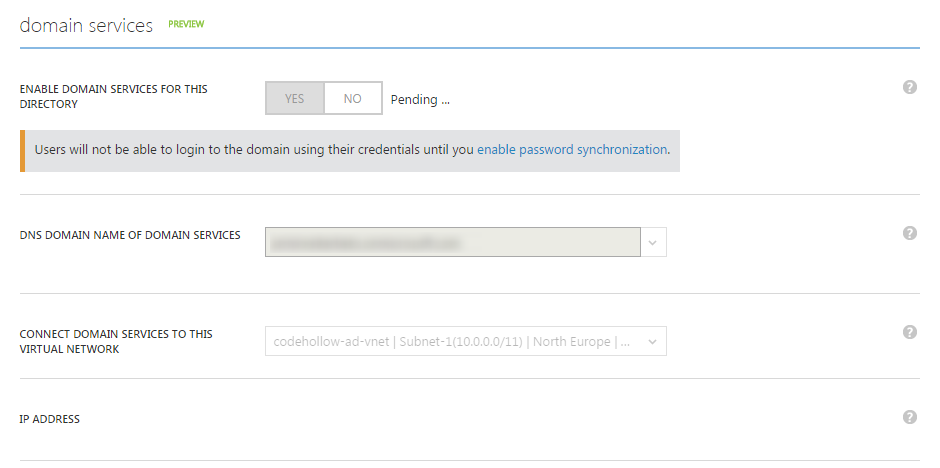
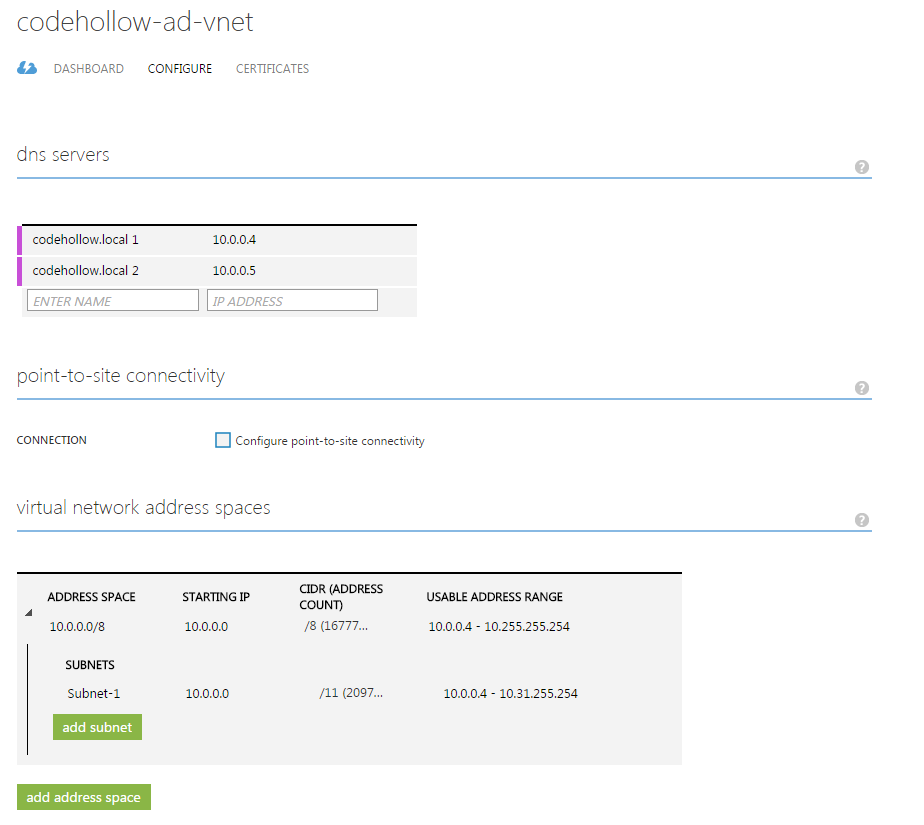
Step 4 – Update DNS settings
Go to your virtual network, click on configure and add the IP addresses from the previous step as DNS servers:
Step 5 – reset your passwords
I logged in with my users and azure asked me to enter a new password. The alternative is to go to http://myapps.microsoft.com, sign in with your user, select profile and then change your password.
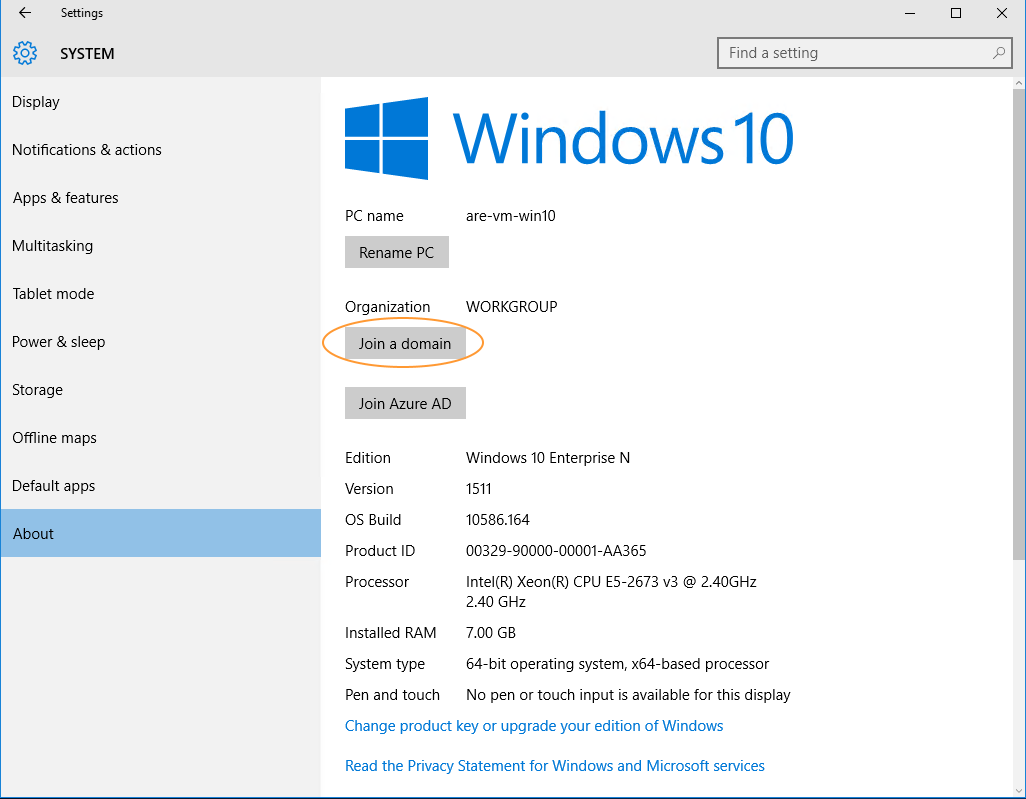
Step 6 – create virtual machine
The virtual machine must be part of the virtual network that is assigned to the AD domain services. This is a classic virtual network and therefore we need to create the virtual machine also in the classic deployment mode.
I decided to use a Windows 10 Enterprise image for my virtual machine, but you can use whatever you need. Connecting the machine to the domain services works the same way as for a standard domain controller.
When the machine is up and running, sign in to your VM and go to (in Windows 10): start – settings – system – about – Join a domain
After that, enter your domain – e.g. codehollow.onmicrosoft.com. The system will ask you for a user with Azure AD admin credentials. Enter them, go through the wizard and then restart the machine.
When the machine restarted you need to sign-in with local administrator and allow other users to use remote desktop connection to the machine. Go to the control panel – system and security – system and click on “remote settings” (or run “sysdm.cpl” and go to the tab remote). Now you should be able to add Azure Active Directory users and groups.
When this is done, then you can use your Azure AD users to connect via Remote Desktop to your virtual machine. In the system view, you can see that the machine is connected to the AD and I already used a user of the active directory to sign in:

Additional information
https://azure.microsoft.com/en-us/documentation/articles/active-directory-ds-getting-started/


Comments are closed