
The first important thing to mention is, that there are two types of the Azure billing API. One is the billing API for EA (enterprise agreement) customers. This API is easier to use, because it returns the costs in a separate field (extendedCosts). If you have an enterprise agreement, I recommend to check the following blog post: http://www.redbaronofazure.com/?p=631.
The other one is the billing API for non EA users (see Azure Billing REST API Reference. This API has two services, the RateCard API which returns costs for your resources (e.g. S1 DocumentDB costs per hour in region West Europe). I already blogged about how to export the RateCard data to CSV. In this post, I’ll focus on the second one which returns the usage data. This service returns the usage of your resources – e.g. “Standard IO – File Write Operation Units (in 10,000s), quantity: 3.182, …”. Unfortunately, the usage API does not return the costs per resource. If you want to know the costs, then you need to combine the RateCard data with the Usage data.
Update February 7, 2017: I built a .net library and published it as NuGet package which you can use to get data from the usage api and the ratecard api. The library also combines the usage and ratecard data and calculates the costs. The code is published on GitHub and I blogged about the usage and the configuration of it:
- Blog post: Using the Azure Billing API and calculate the costs
- NuGet Package: https://www.nuget.org/packages/CodeHollow.AzureBillingApi/
- GitHub Repository: https://github.com/codehollow/AzureBillingApi
This blog post is still valid, it shows the how to configure and build an application that uses the Azure Billing Usage REST API.
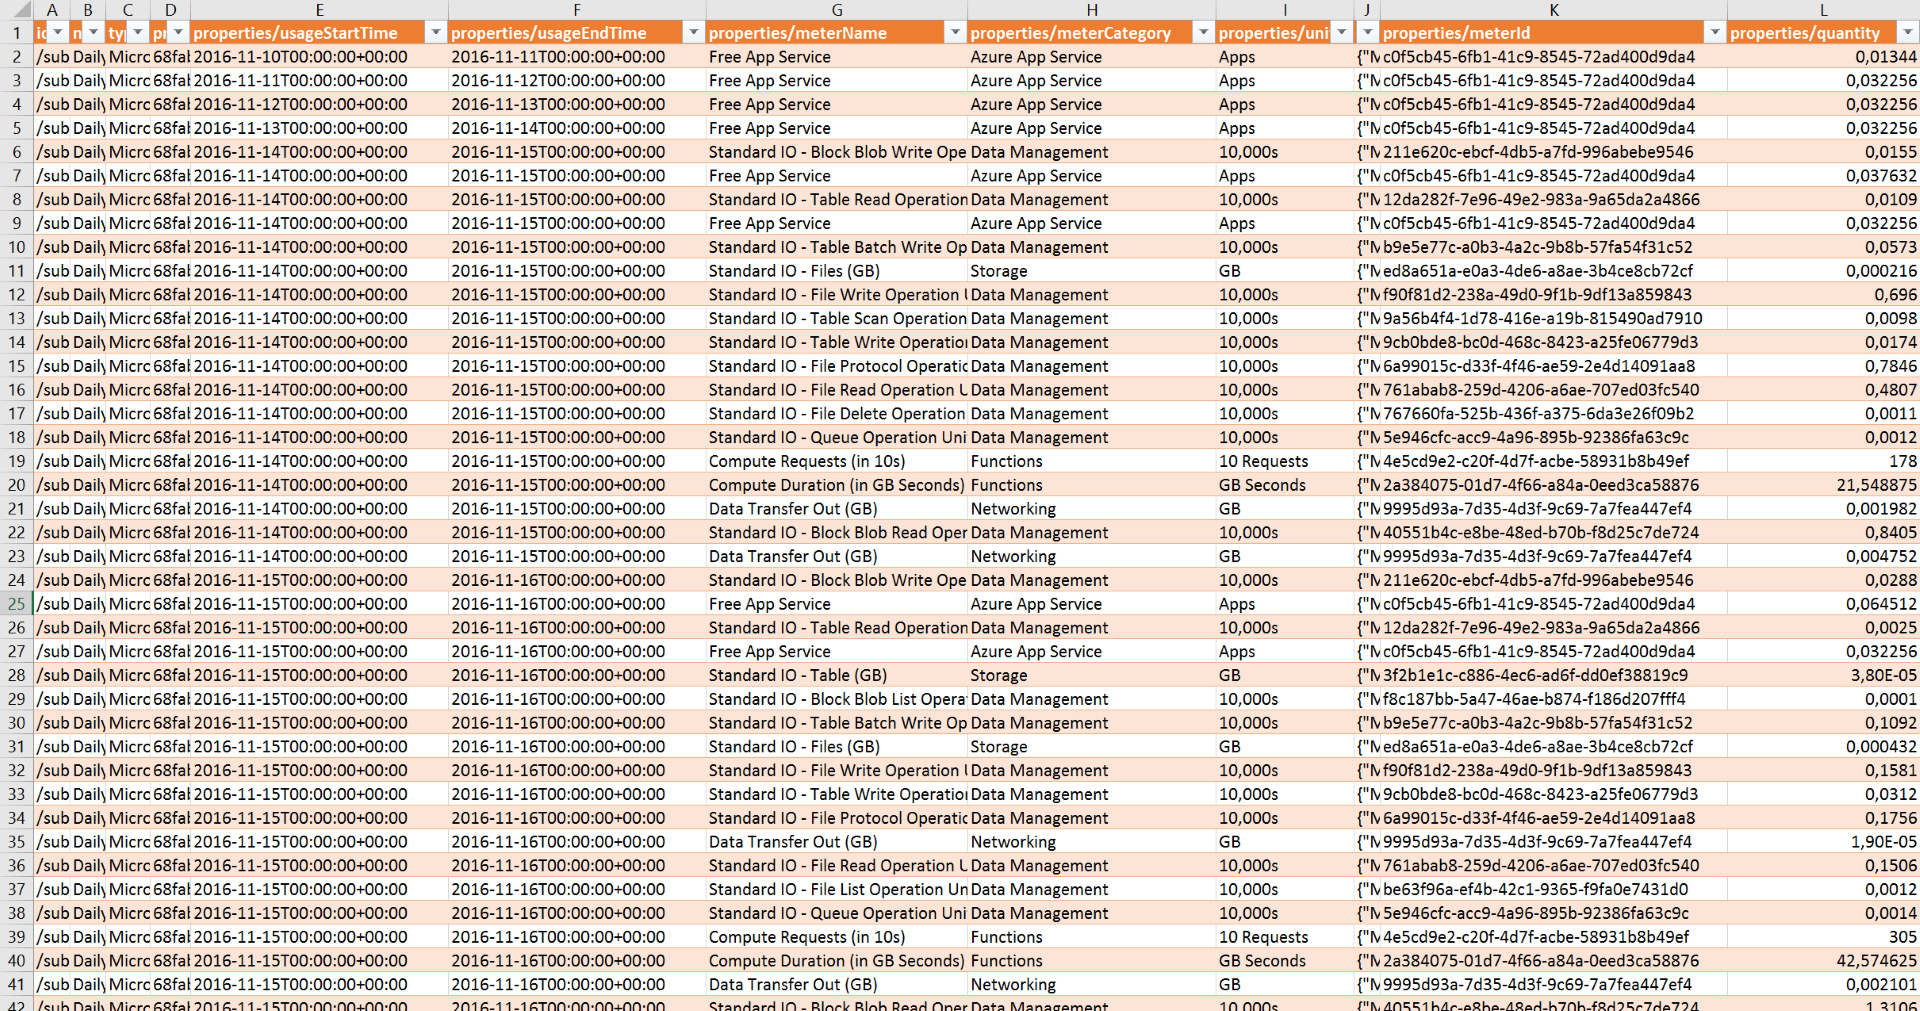
Result of the Usage API
If you execute the steps, described below, then you’ll receive a CSV file. If you open that with Excel and format it as table, then it looks like:
Usage Billing API C# Application
Please download or clone the solution from GitHub: https://github.com/codehollow/AzureBillingUsageSample.
Step 1: basic app.config configuration
Open the solution and the app.config and configure the following values:
<add key="Tenant"         value="TENANT.onmicrosoft.com" />
<add key="SubscriptionId" value="SUBSCRIPTIONID" />

<add key="CsvFilePath"    value="c:\data\usagedata.csv"/>
The other values will be configured in the next step. So leave the file open so that you can copy and paste the values from the AAD configuration.
ATTENTION: The following steps are the same as in my previous post about using the Azure Billing RateCard API.
Configuration
Before we can run the sample application, we have to add the application to Azure AD and give it the right permissions.
Step 2: add new application to active directory
Open the new portal https://portal.azure.com and navigate to the Active Directory. Open “App registrations” and click the Add Button:
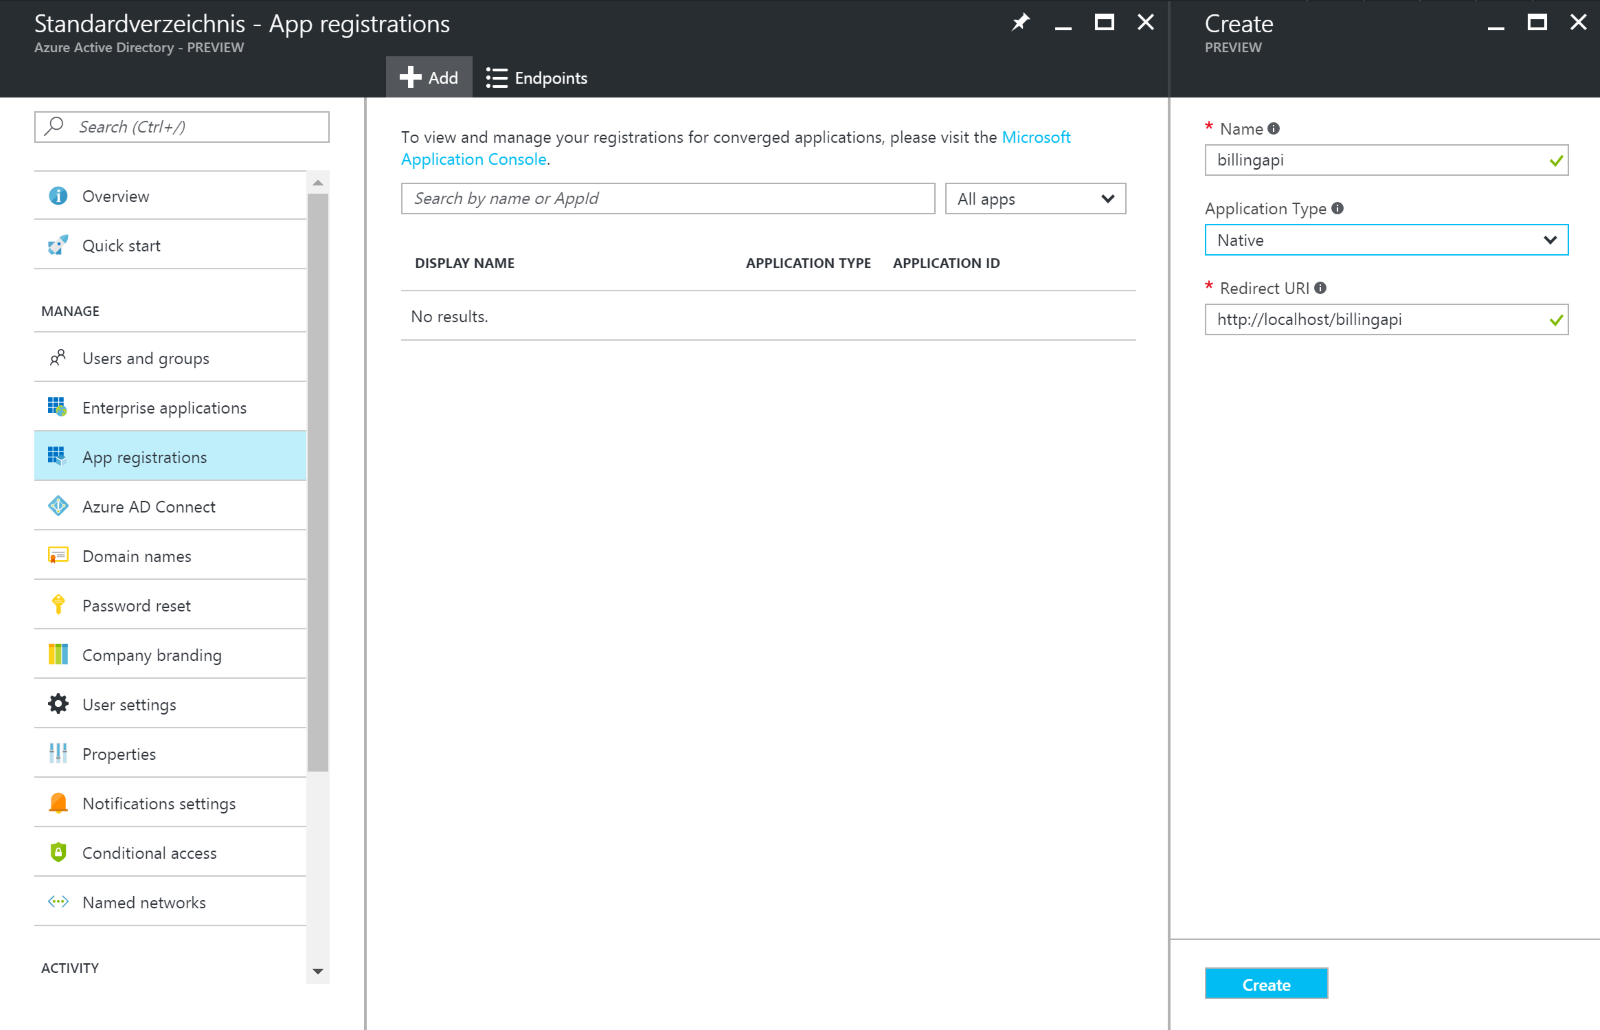
- Name: billingapi – can be whatever you want
- Application Type: Native – we use the API from a console application, so native is the right one. If you develop a web application that should access the api, “Web App/API” is the right one for you
- Redirect URI: http://localhost/billingapi – can be whatever we want, because the console application will not redirect to an url
Copy the Redirect URI and paste it to the app.config to “RedirectUrl”.
Step 3: add permissions to the service management api
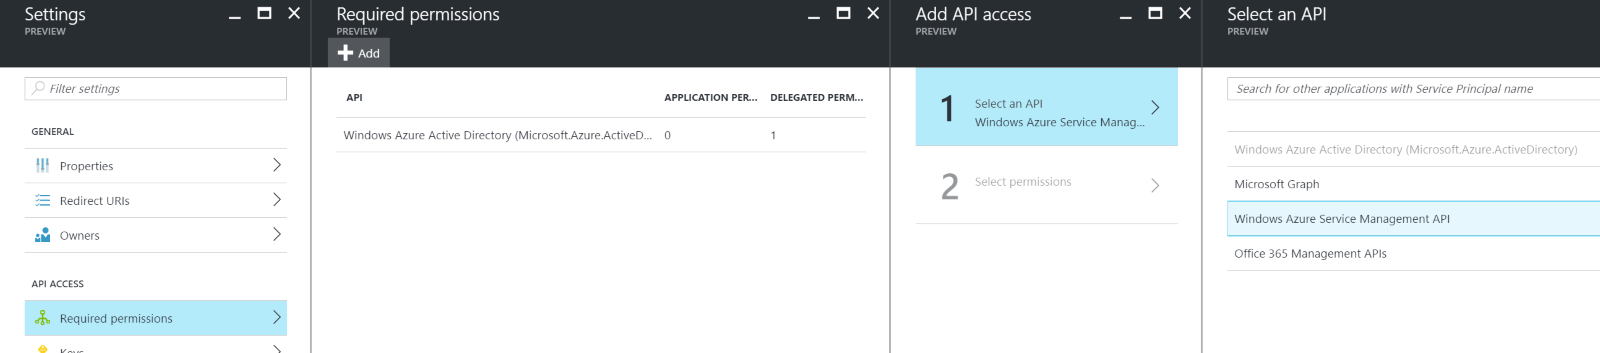
When the app is created, open the app (in App registrations), go to Settings and “Required permissions”. Press the add button and add: Windows Azure Service Management API.
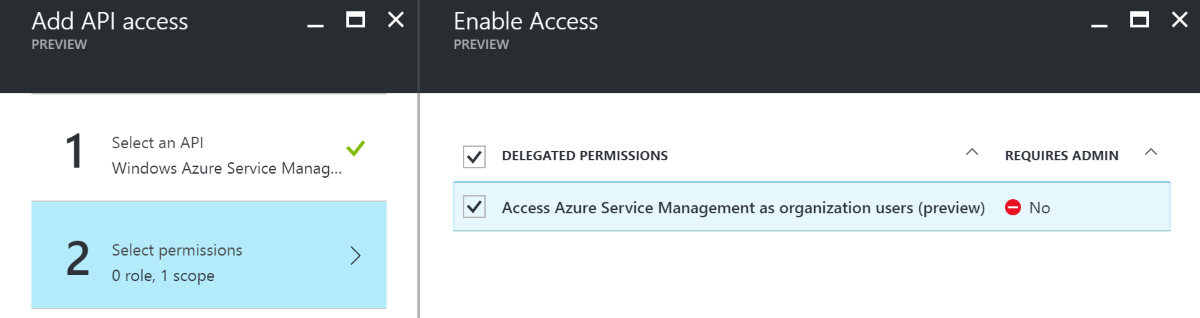
Select “Access Azure Service Management as organization users (preview)” and save it:
Step 4: copy the client Id
The client Id is called “Application ID” in the Azure portal. You can find it when you select the app in the “App registrations”. Copy it and paste it to the app.config to “ClientId”.
Step 5: give the user/application access to the subscription
There are two ways how to authenticate. You can sign in with your user or you can use a client id and a client secret to authenticate (application). The first is good if you want to work with a specific user, the second is good for clients that run in the background (azure function, jobs, …)
Depending on what you want to use, you have to give the user or the application “Reader”, “Contributor” or “Owner” access to the subscription.
Navigate to your subscription, select your application and go to “Access control (IAM)”.
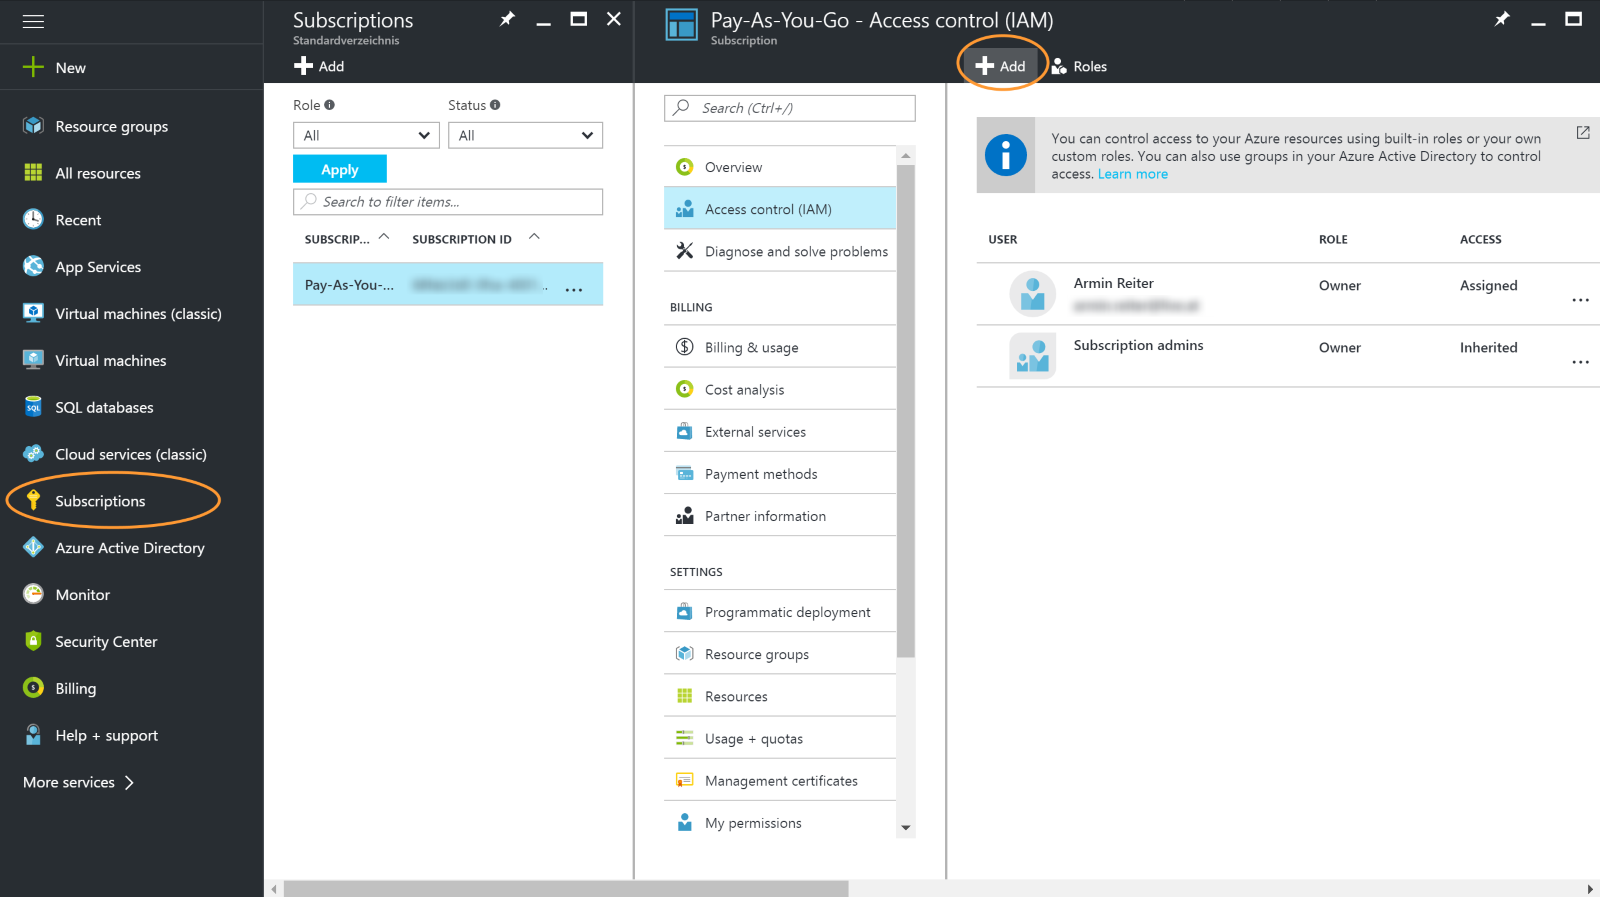
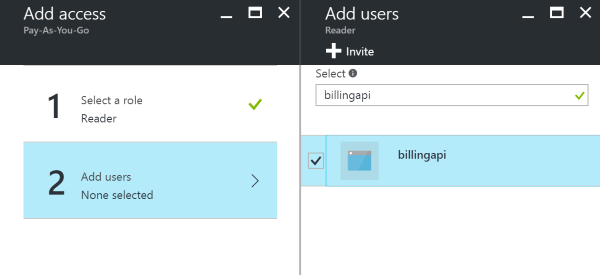
If you want to use user and your user does not already have rights, just add the user and give him at least “Reader” access:

If you use application, search for the application and give it at least “Reader” access:
Step 5.1: create client secret (only for authentication via application)
If you use application (see previous step), you need to create a client secret – a key. You can skip this step if you use user authentication. The key can be created by navigating to the active directory – “App registrations” and selecting Keys. Add a new key, give it a name and select a duration:
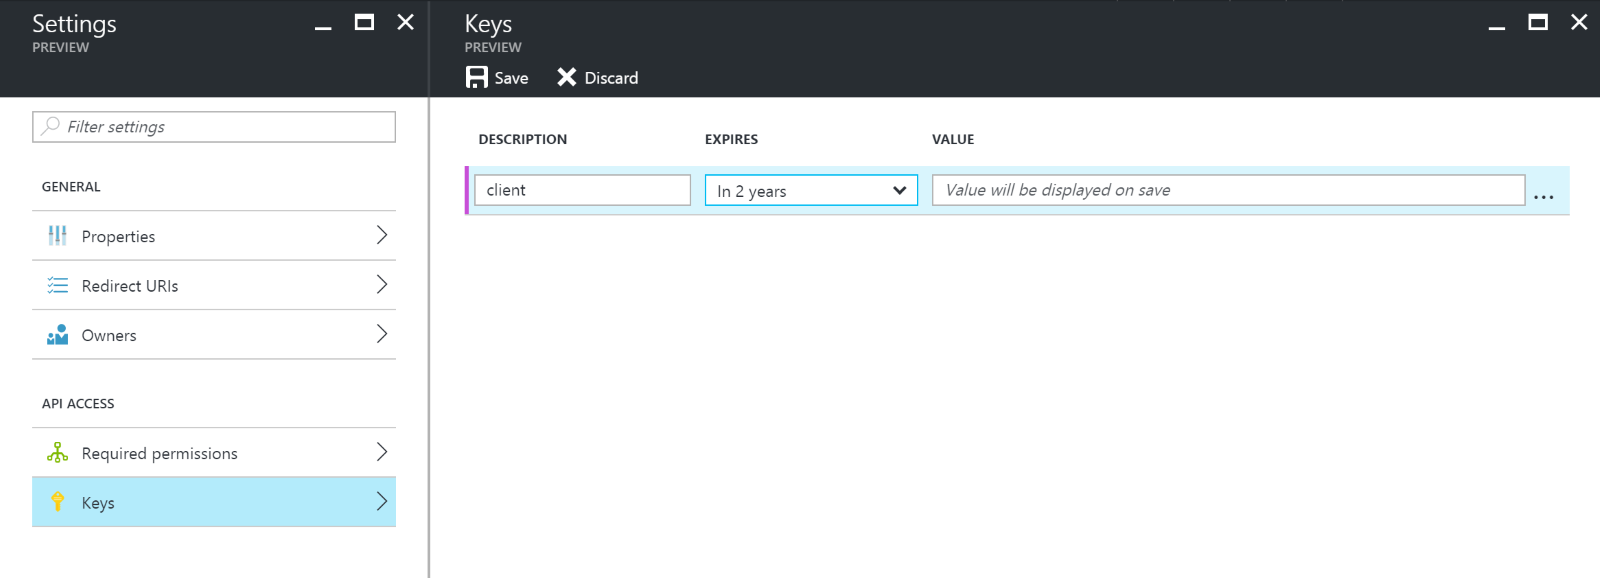
Press save and copy the key! This is the client secret that needs to be pasted into the app.config – “ClientSecret”.
Run the application
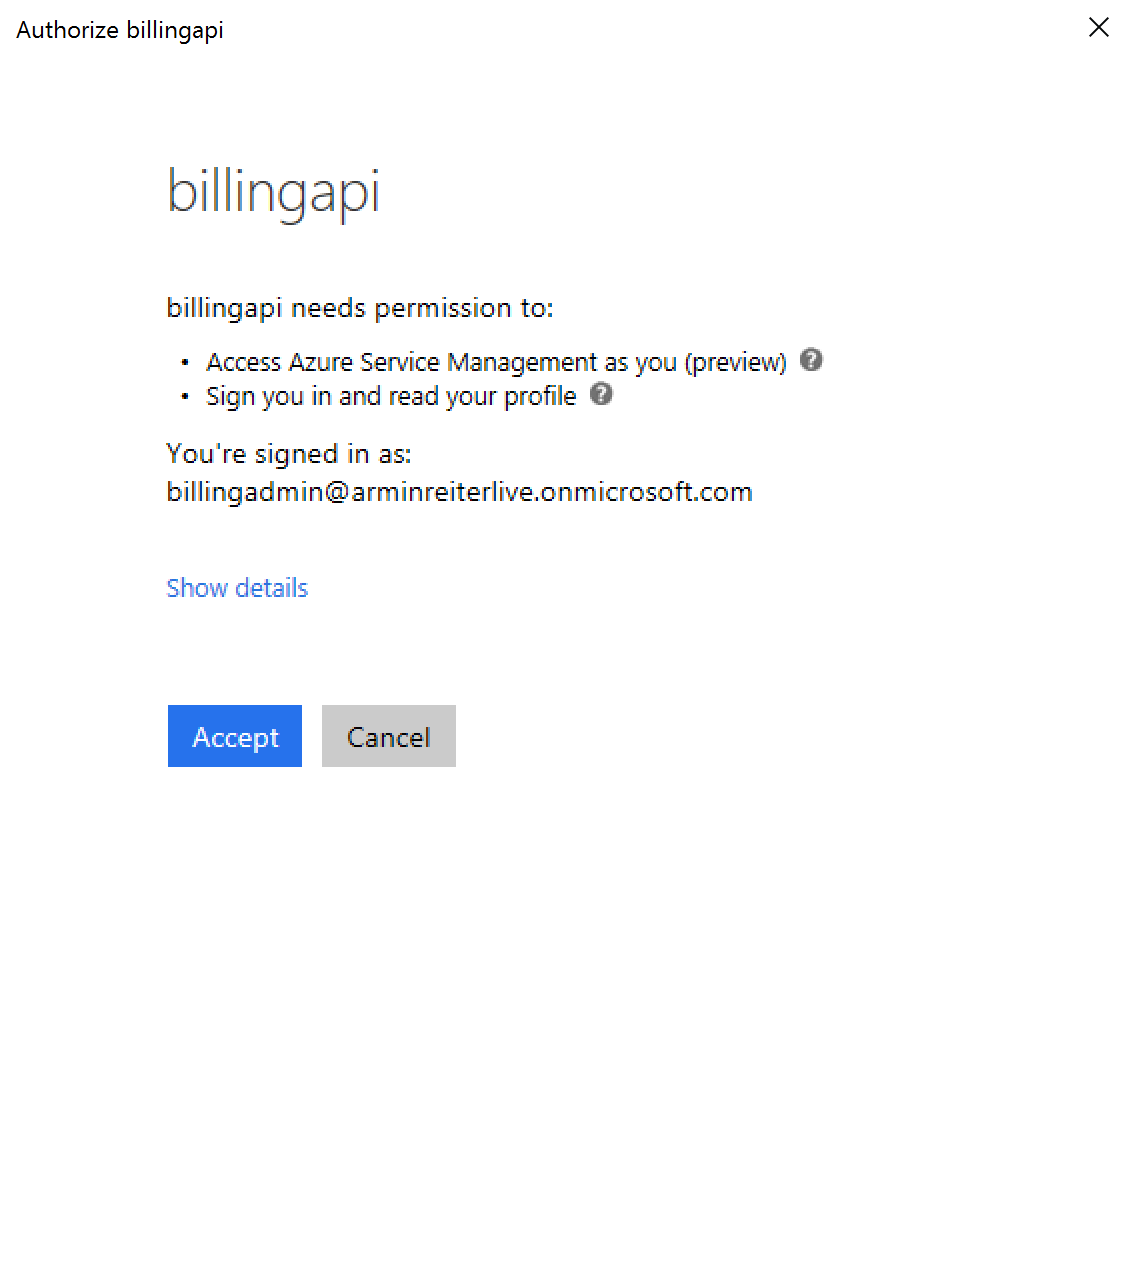
If all steps mentioned in Configuration are done and the app.config is configured, build and run the application. If you use user authentication, you must allow the application (only the first time) to sign in and to access the service management api:
If the application finished successfully, you should find a csv file at the path specified in the app.config (by default: c:\data\usagedata.csv)
Troubleshooting
I ran into some issues, so here is what I did:
401 – Unauthorized
There are many reasons why this could happen. Look at the output of the webrequest and check the error_description field. I once got the following message: “The access token is from wrong audience or resource.“.
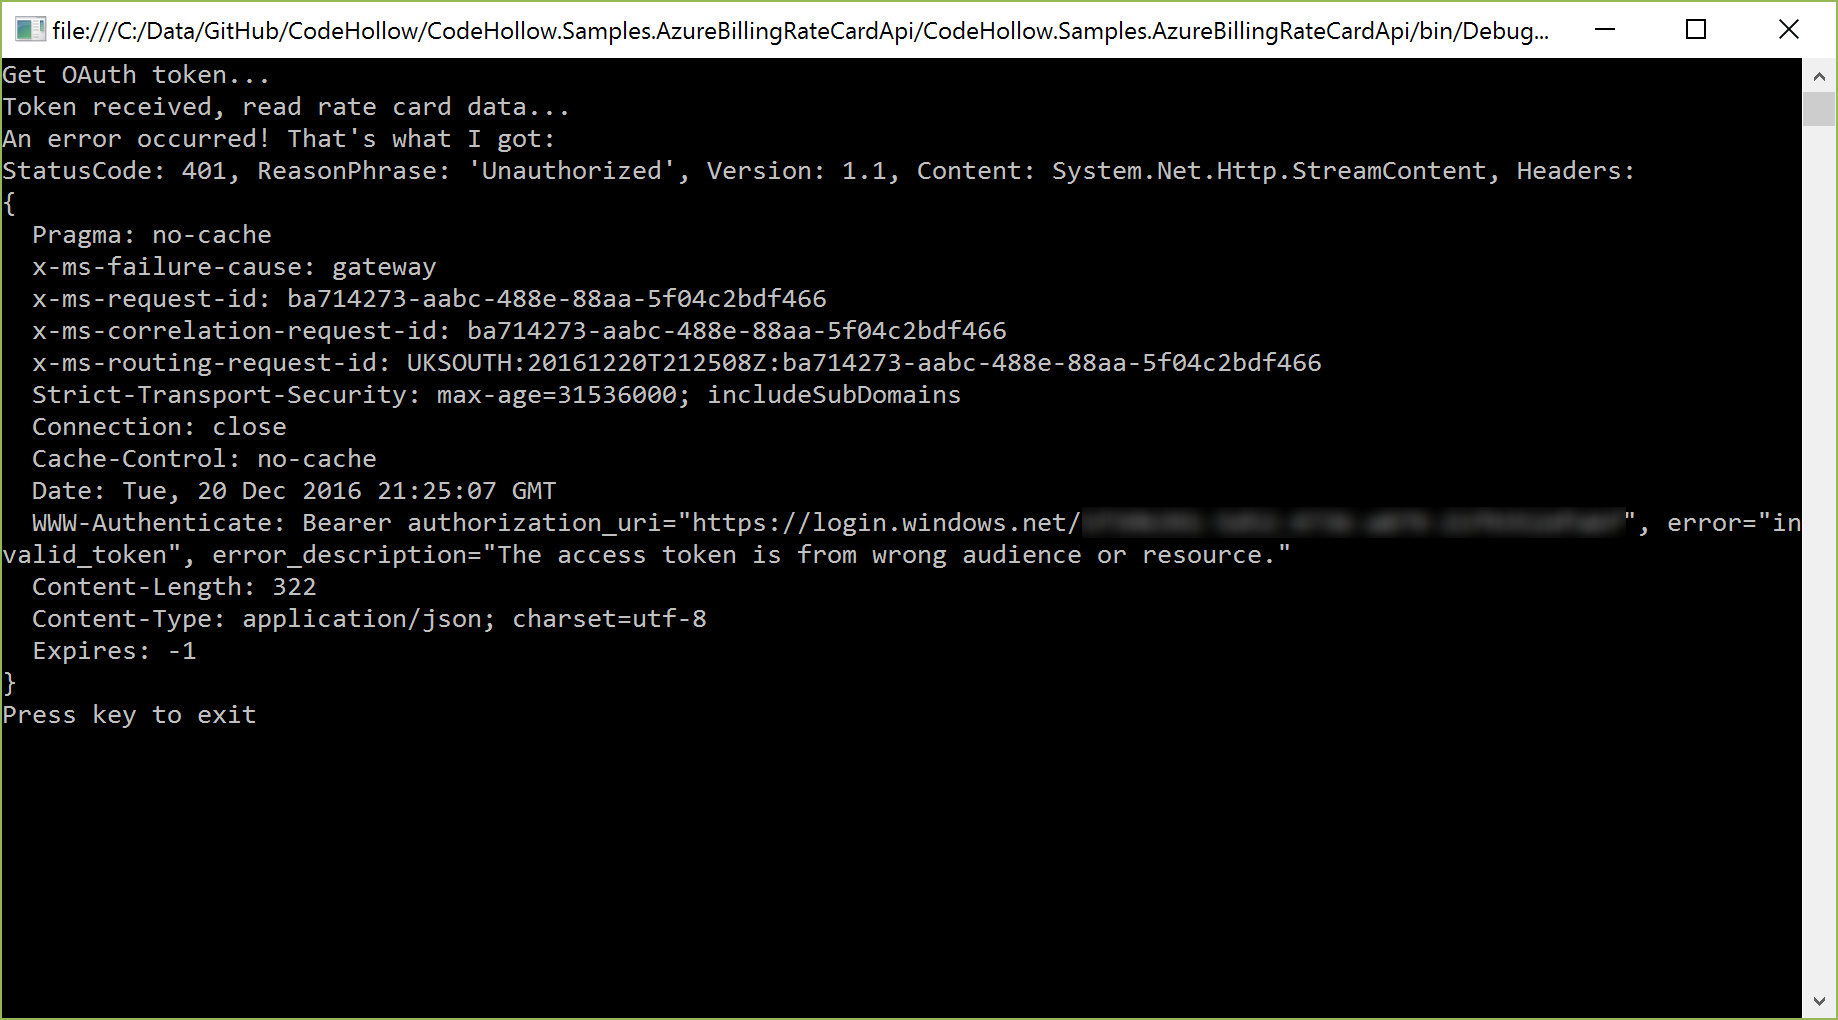
This issue can be solved by fixing the resource url. The correct value is:
https://management.azure.com/
And…believe or not…the slash / at the end does matter! So if you are using: https://management.azure.com (without / at the end), then you will receive this error!
403 Forbidden
That’s a good message, because it means that you are already logged in! I got this error, when the user/application did not have access to the subscription. Please double check if you did Step 5: give the user/application access to the subscription
System.AggregateException
If you get this at the authTask.Wait(); statement, check the InnerException. I got the following errors:
AADSTS65005: The client application has requested access to resource ‘https://management.azure.com/’. This request has failed because the client has not specified this resource in its requiredResourceAccess list.
This error occurs if the application does not have enough permissions. I solved it by doing Step 3: add permissions to the service management api. If you have another application, then you probably need to add other/additional permissions. For the Usage Billing API it’s enough to configure access to the Service Management API.
AADSTS70002: The request body must contain the following parameter: ‘client_secret or client_assertion’.
I got this error when I used user authentication and the application in the Azure AD was configured as web/api application. I changed the application to native (because it is a console application) and it worked (see
Step 2: add new application to active directory).
If you use application authentication (client id + client secret), this error will not occur because the authentication process does not call the reply url.
Additional information
Azure Billing REST API Reference: https://msdn.microsoft.com/en-us/library/azure/mt218998.aspx
Azure Billing Usage REST API Reference: https://msdn.microsoft.com/en-us/library/azure/mt219001.aspx
Microsoft Azure Billing API Code Samples: Usage API: https://github.com/Azure-Samples/billing-dotnet-usage-api


Comments are closed