
This is the first blog post about Azure API management. In this post I will describe how to set it up and how to basically use it. In the second blog post I will focus on features like security, how to connect the Azure Active Directory or how the policies work.
API Management is a really cool service in Azure. It’s currently only accessible via the classic portal, which doesn’t mean that it is out of date. The API management allows you to give developers access to your APIs. In the B2B context, you can use it to implement things like security, analyzers and others. In the B2C world you can offer your customers access to your APIs and you can control who, how much etc. they will access your APIs.
Features
This is not a full list, but it’s a good overview of some features:
- Security
- restrict API access to some specific users
- protect your API with Azure AD (and allow a specific group to access it) or others (Facebook, OpenID, OAuth, Twitter and many others)
- limit API calls to a maximum of e.g. 5 calls per minute
- restrict access to the API to some specific IP addresses
- avoid DOS attacks by throttling (e.g. only 10 calls per minute per IP address/user/client or a maximum of 200.000 calls per day)
- use certificate or basic http as additional authentication
- Single point of contact (one static IP and URL for your API calls)
- Change the behavior of your API with policies
- e.g. add a header property to the response of each call
- Caching
- Monitoring
- See number of calls, errors, bandwidth and response times
- connect google analytics
- Connect to VPN or ExpressRoute
- Deploy to multiple regions
- Logging
- Developer portal
- Quick developer onboarding
- user registrations and mail notifications
- nice interface to test your API and see the documentation
It contains a lot of nice and cool features, but it also costs something – unfortunately there is no free edition available. The cheapest plan currently is the developer plan which costs about 50$ a month.
Create your first API management service
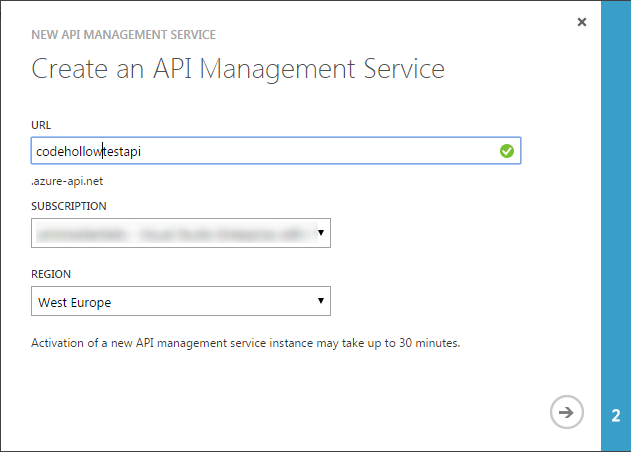
As already mentioned, the API management is only available in the classic portal – so you can only add it there. You can find the link to add it in the new portal, but it will redirect you to the classic portal:
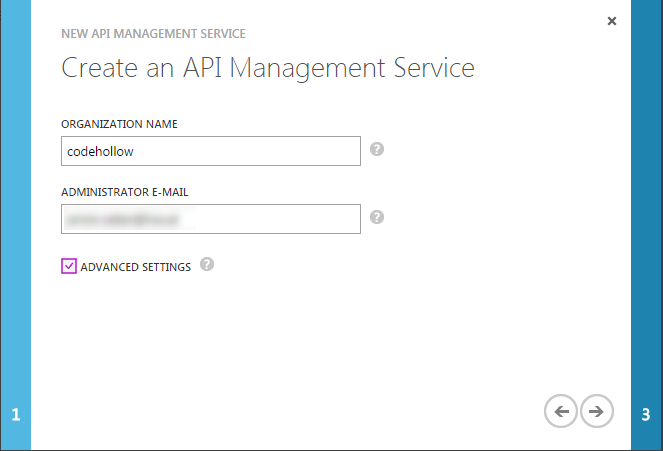
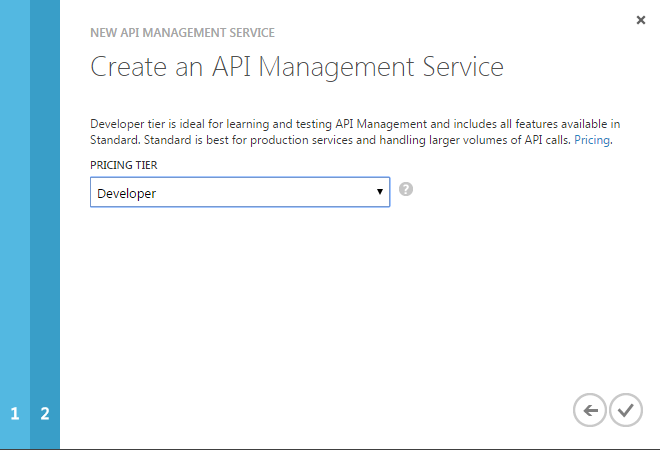
If you want to modify or select the plan (pricing), choose “advanced settings” and another step will be added to the dialog. You can change the plan later on, as usual in Azure:
The differences between the pricing teers can be found here: https://azure.microsoft.com/en-us/pricing/details/api-management/
The creation and activation of the service take about 30 Minutes. It’s enough time to create a simple ASP.NET Web API and deploy it to Azure :).
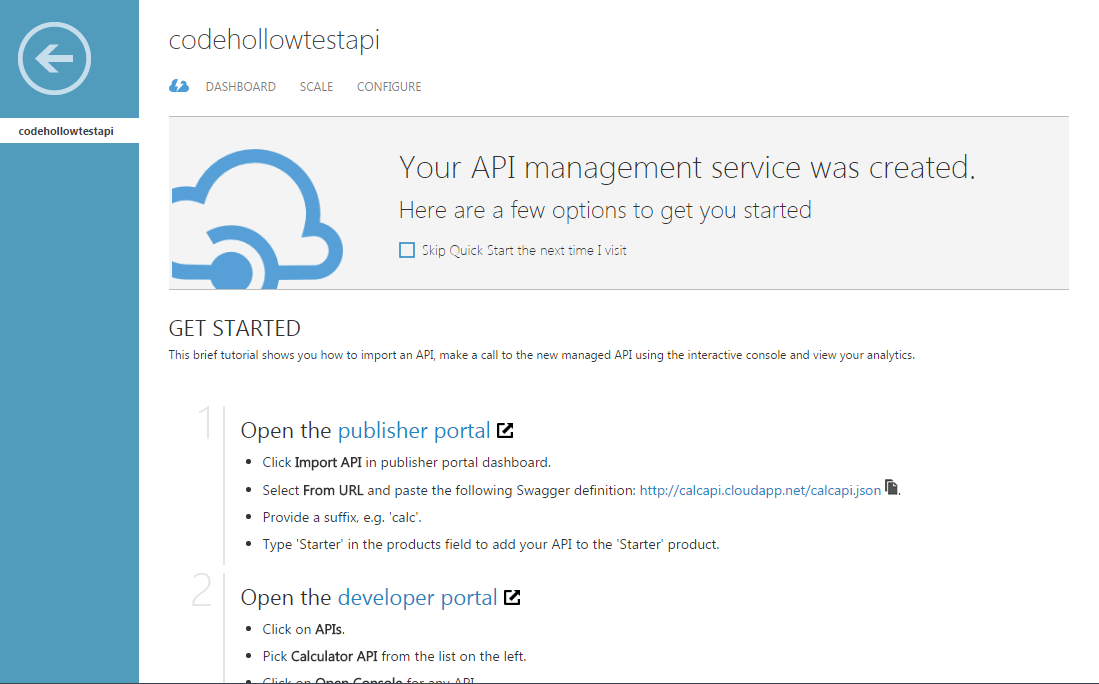
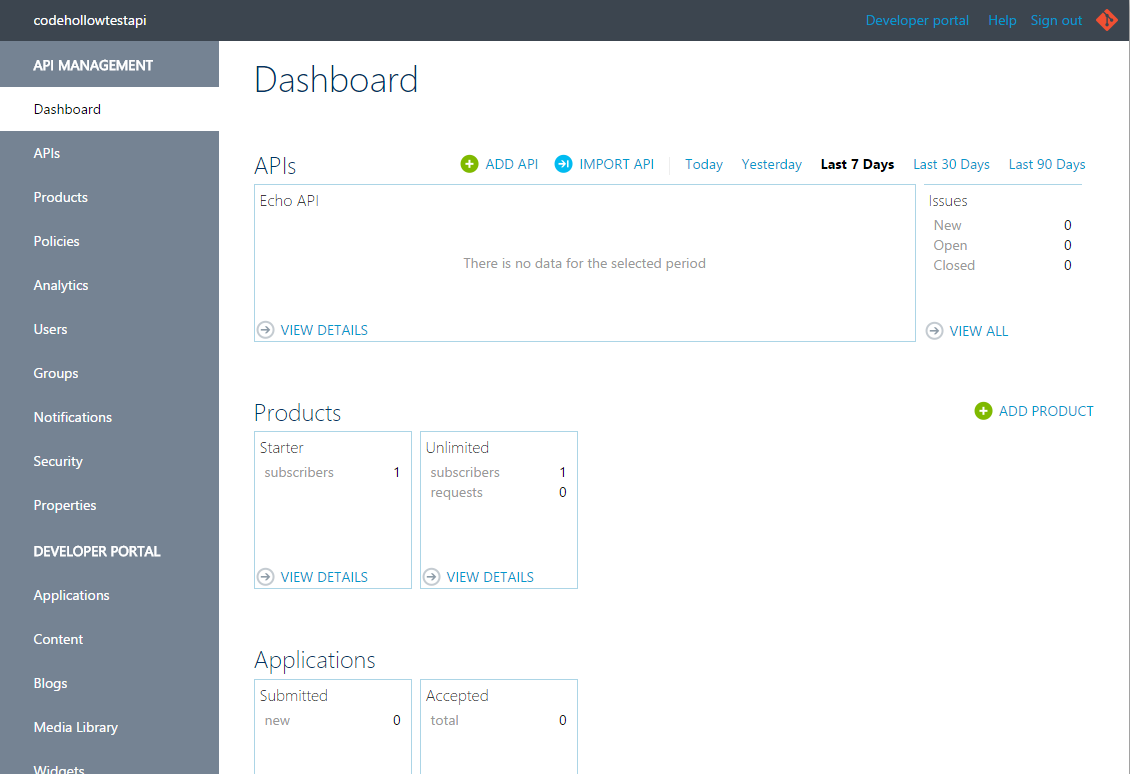
When the API management was successfully created, jump into the API management and you’ll see the dashboard:
We can see that there are links to the publisher portal and the developer portal. At first we will jump into the publisher portal and add an API to it. The developer portal comes later when we start to use our API.
Import an API
You can add a new API or import one in the publisher portal:

If you for example have an API with swagger, then you can simply import that one. You just need the URL to the documentation JSON and you’re ready to go. In swagger, you can find the URL on top:
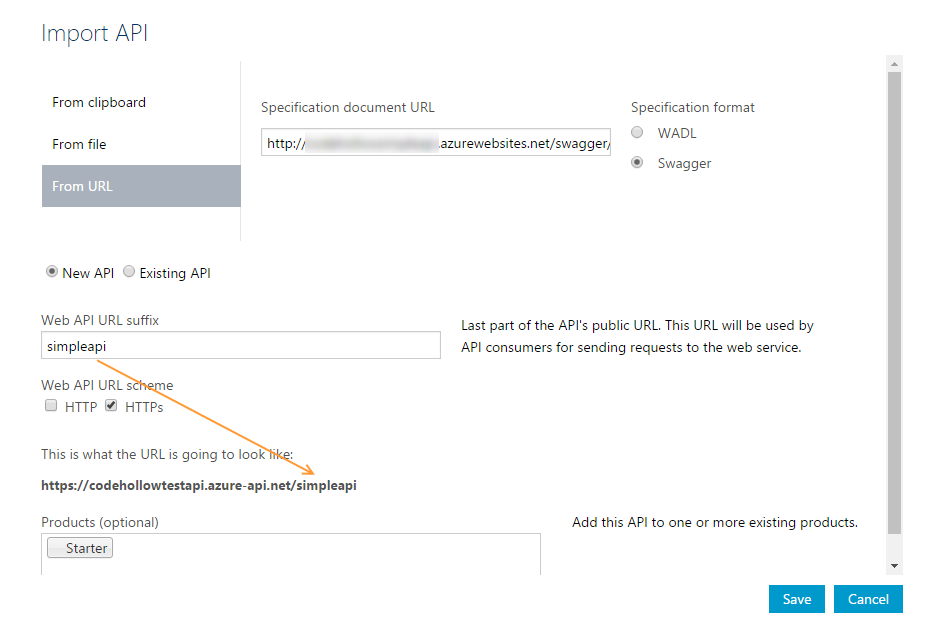
Insert that URL in the “specification document URL” in the import dialog:
Press save and the API is ready to use.
Developer portal
Our API is up and running and you probably want to try it immediately. But if you do so, then you’ll receive the following error:
{ “statusCode”: 401, “message”: “Access denied due to missing subscription key. Make sure to include subscription key when making requests to an API.” }
This error occurs when you miss the subscription key in the header. Let’s jump into the developer portal to see how to get the subscription key. The link to the developer portal is on the upper right corner (or you can remove /admin from the URL) and it looks like:
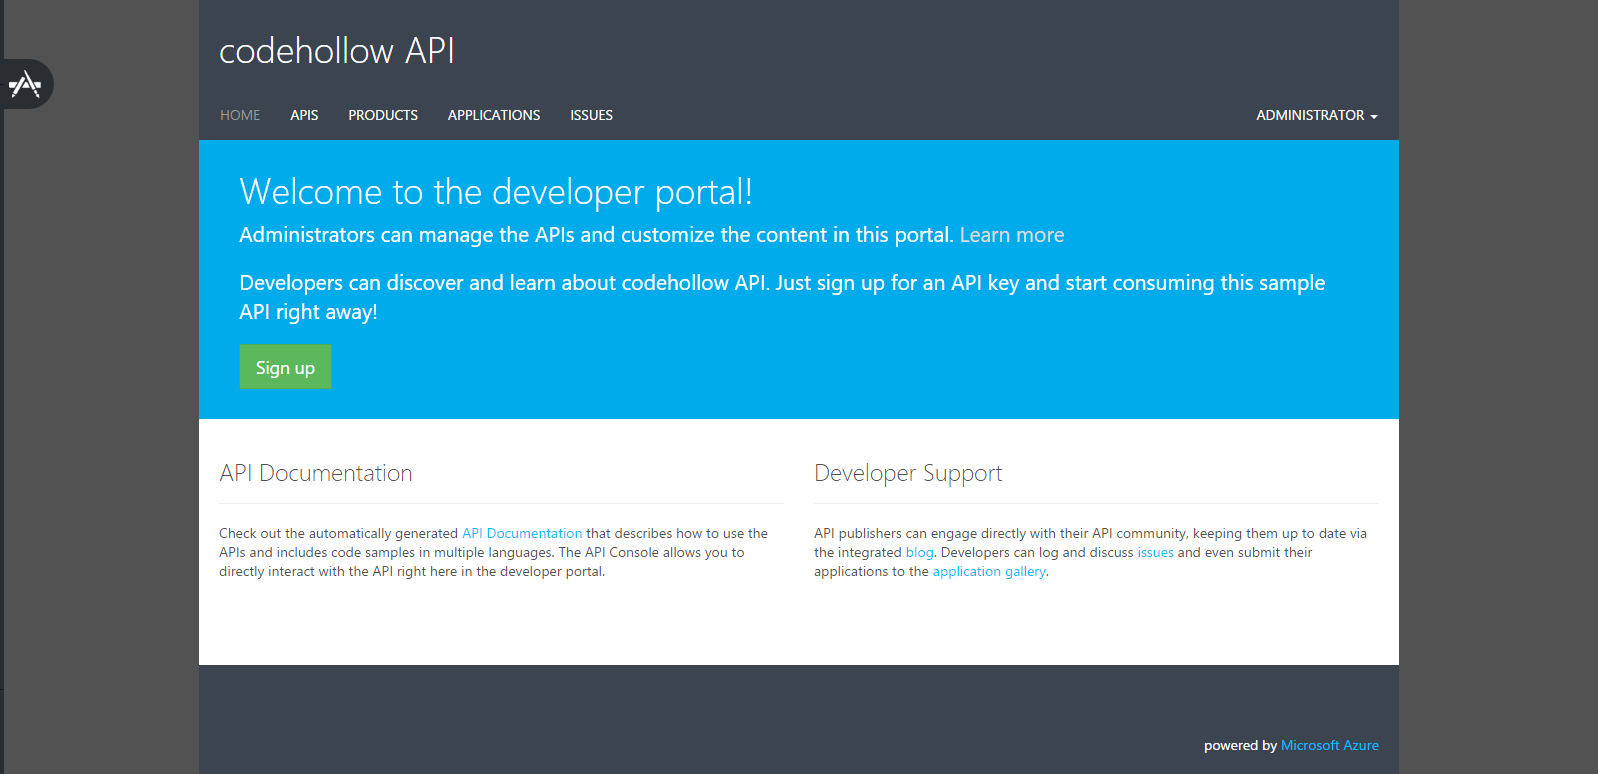
The portal is by default visible to everyone who knows the URL. So it makes sense to customize it to your corporate identity. But let’s focus on the development stuff and let’s test our API. Go to “API” and select your API on the right side:
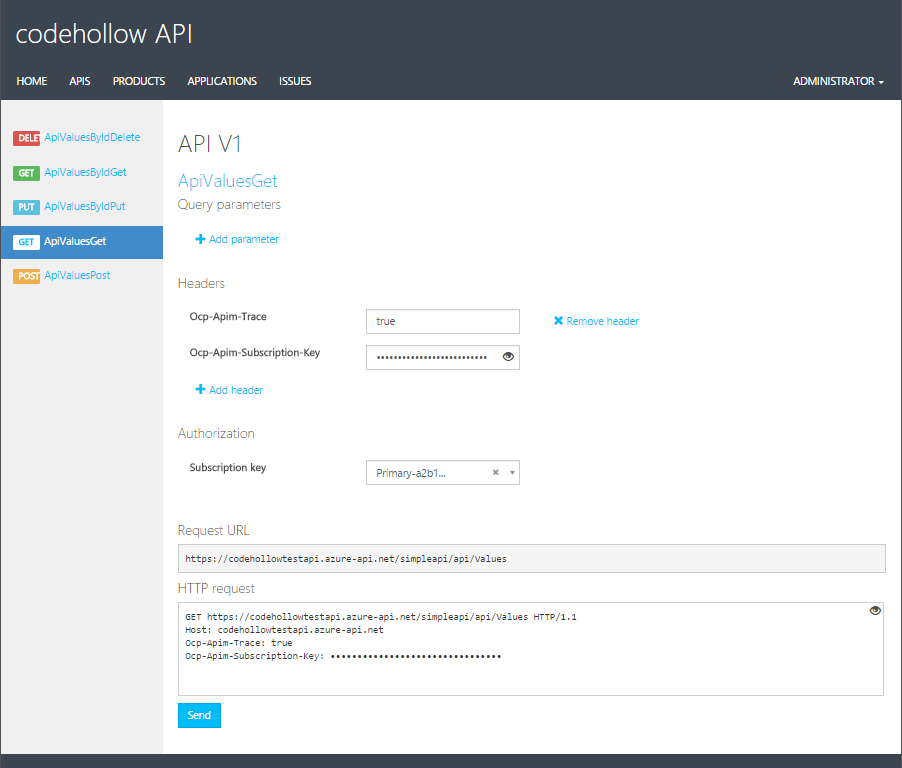
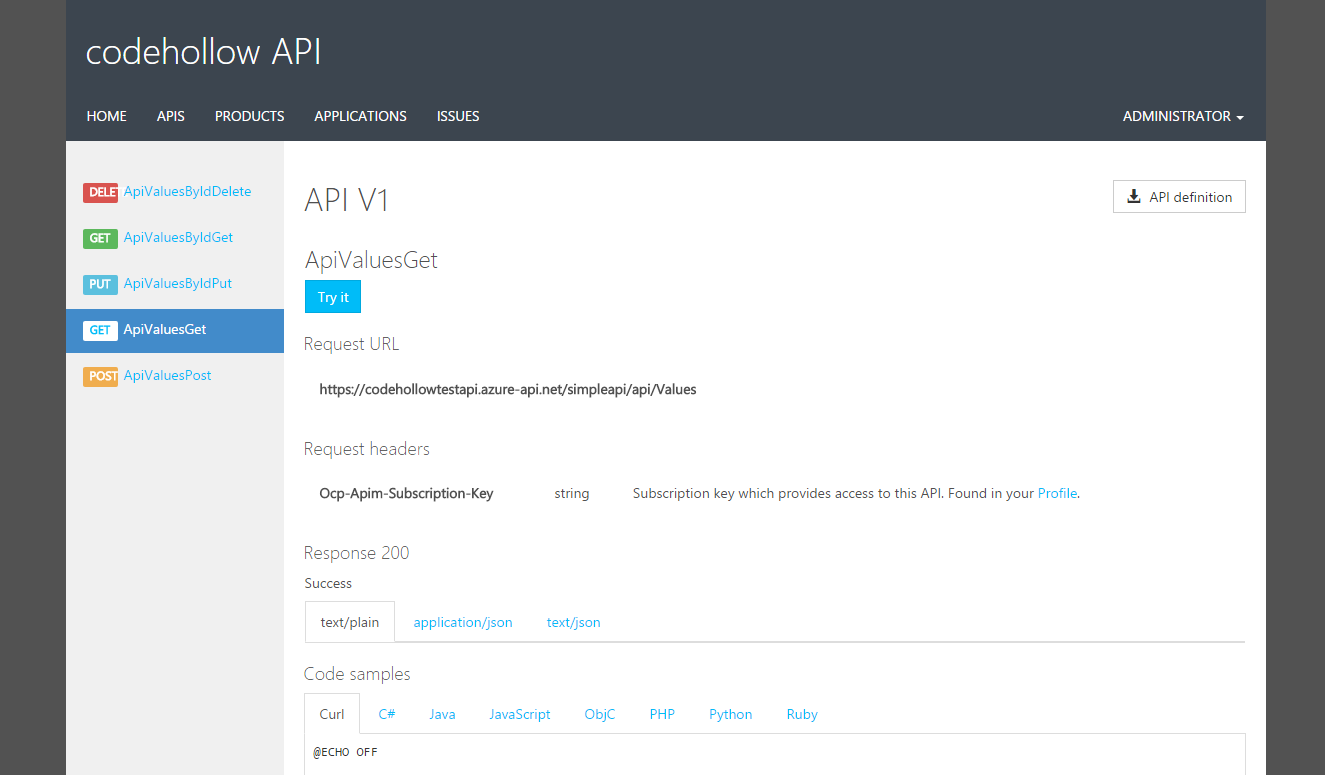
You can now select a method and try it with the “try it” button. It opens a screen which allows you to enter parameters and other stuff. There we can also see the subscription key (Ocp-Apim-Subscription-Key):
Press the send button and you will see the API call including the subscription key and also the result of the API call. Really cool!
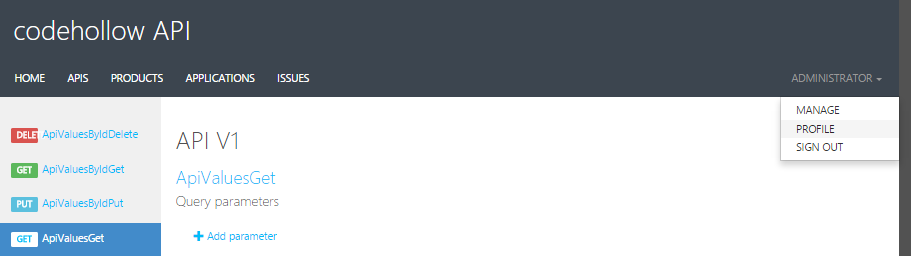
Another way to find the subscription key (Ocp-Apim-Subscription-Key) is to check your profile. Click your user on the upper right corner and go to “Profile”:
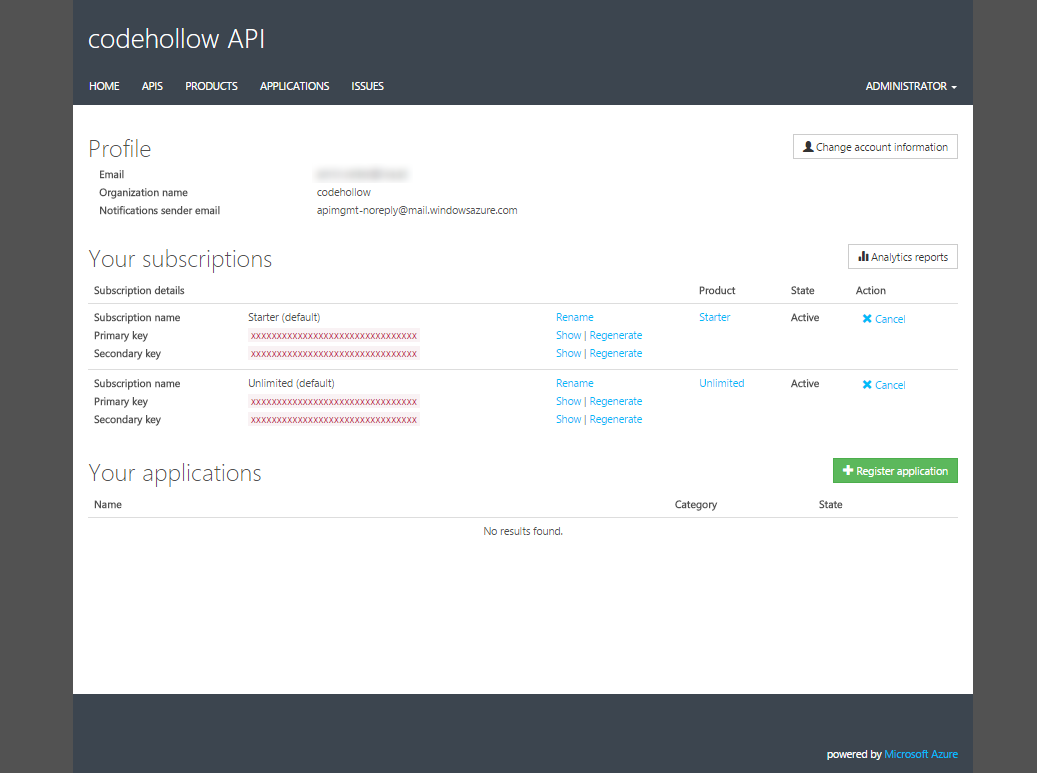
In the following screen you can see your subscriptions and the subscription keys. If you don’t see anything there, go to products, select one and press subscribe. The subscription must be approved by an administrator.
Test the API
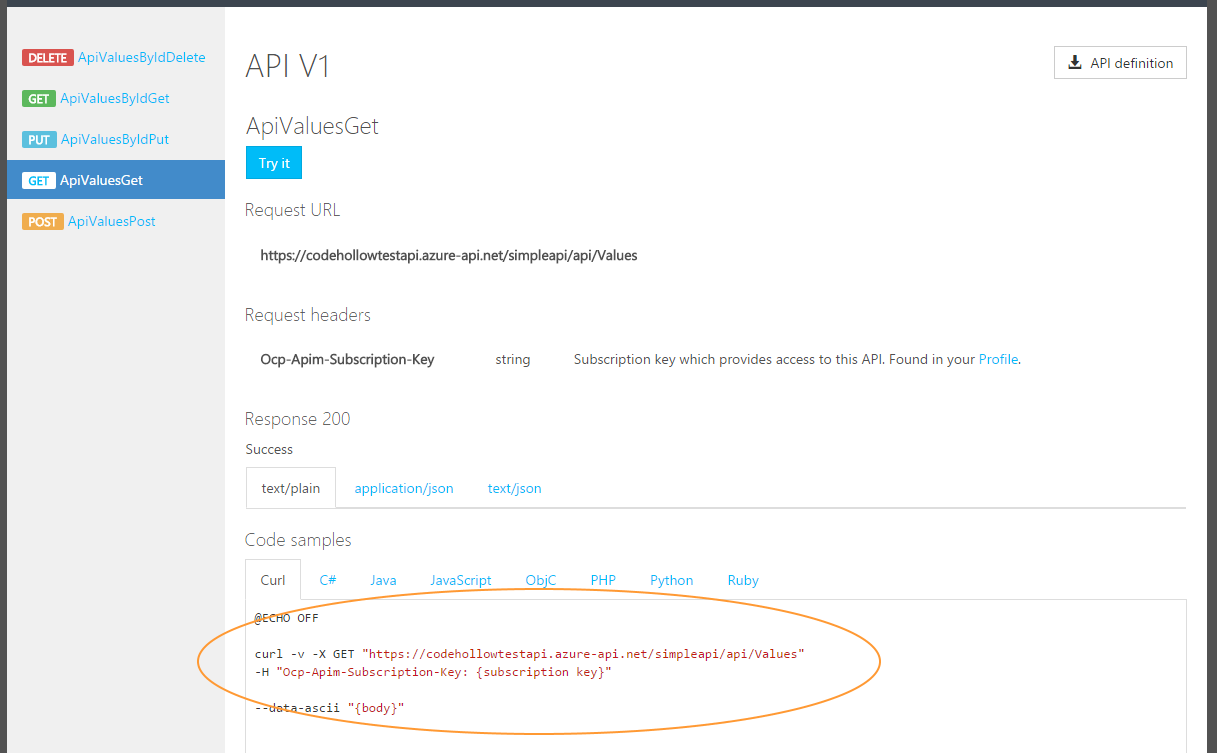
Beside the developer portal, the easiest way to test your API is to use Powershell. The developer portal shows us the curl call and we just need to translate it to Powershell:
The Powershell way to do it:
$wr = Invoke-WebRequest -Uri "https://codehollowtestapi.azure-api.net/simpleapi/api/Values" -Headers @{"Ocp-Apim-Subscription-Key"="{subscription key}"}
$wr.RawContent
My next blog post will contain, how to configure Azure AD security and how to work with policies. Introduction to Azure API management (part 2)
Additional information
https://azure.microsoft.com/en-us/documentation/services/api-management/


Comments are closed