
In this blogpost I will describe how to create a ServiceBus and a Topic in Microsoft Azure and how to push some sample data with the ServiceBus Explorer to it. In a following post I will describe how to work with ServiceBus filters.
Before you create the servicebus, you should download the servicebus explorer tool which you can find here: https://code.msdn.microsoft.com/windowsapps/Service-Bus-Explorer-f2abca5a
Create a ServiceBus Namespace
- Go to https://manage.windowsazure.com
- Navigate to ServiceBus
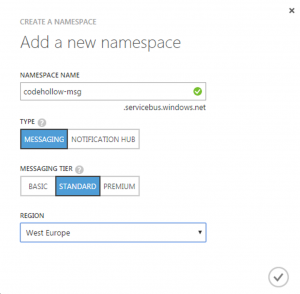
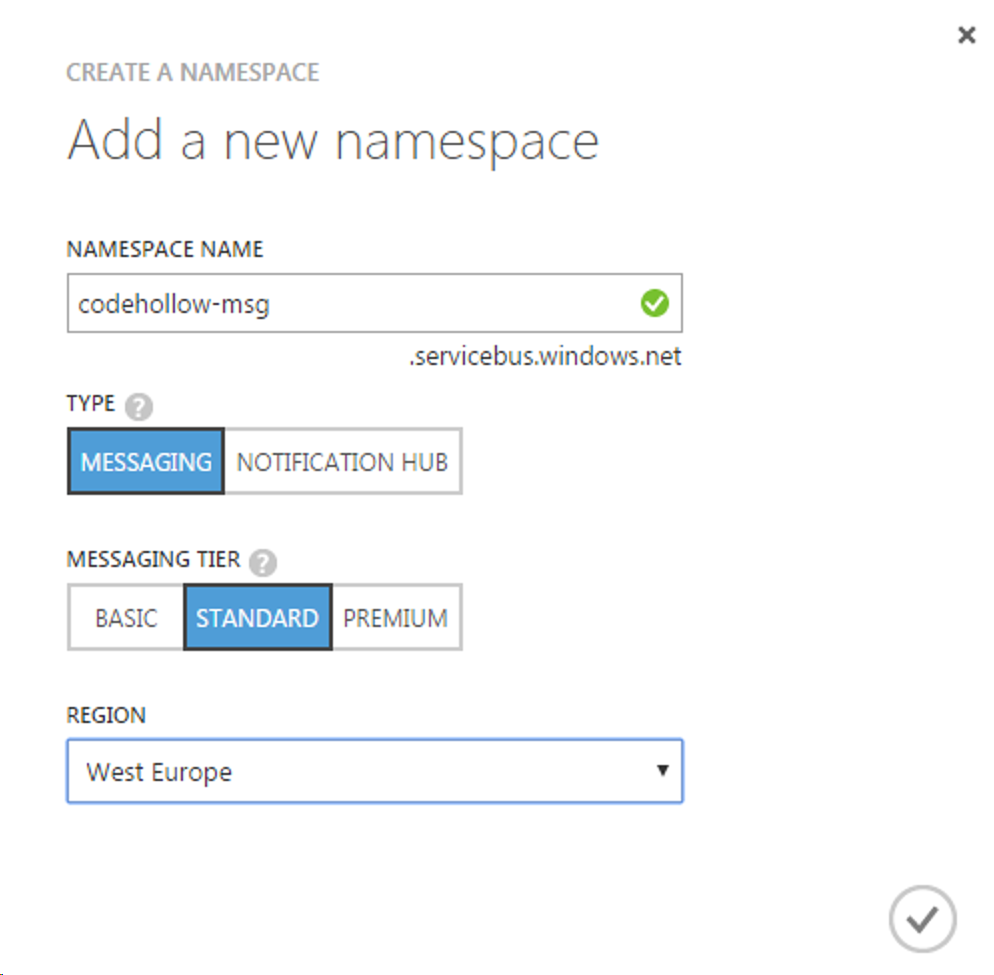
- Click on create and enter your data. If you want to use Topics, you need to create a Standard messaging tier:
- Click on the check mark button at the bottom right side. Now you are ready to connect and push data to it
Connect to the ServiceBus
- Navigate to your service bus namespace and click on “Manage Connection Strings”:
- Copy the connection string under SAS with the name “RootManageSharedAccessKey”. It looks like Endpoint=sb://my-servicebus-name.servicebus.windows.net/;SharedAccessKeyName=RootManageSharedAccessKey;SharedAccessKey=xxxxxxxxxxxxxxxxxxxxxxxxxxxxxxxxxxxxxxxxxxx=
- Start ServiceBus Explorer Tool
- Go to File – Connect
- Select “Enter connection string…” and paste the connection string.
- If you receive a proxy error – see Azure ServiceBus Explorer – Proxy Authentication Error

Create a Topic and Subscription in the ServiceBus
- Create a new Topic by right clicking “Topics” and “Create Topic”. (you can also do this in the Azure portal)
- Give it a relative URI like “messages” and click on “Create”:
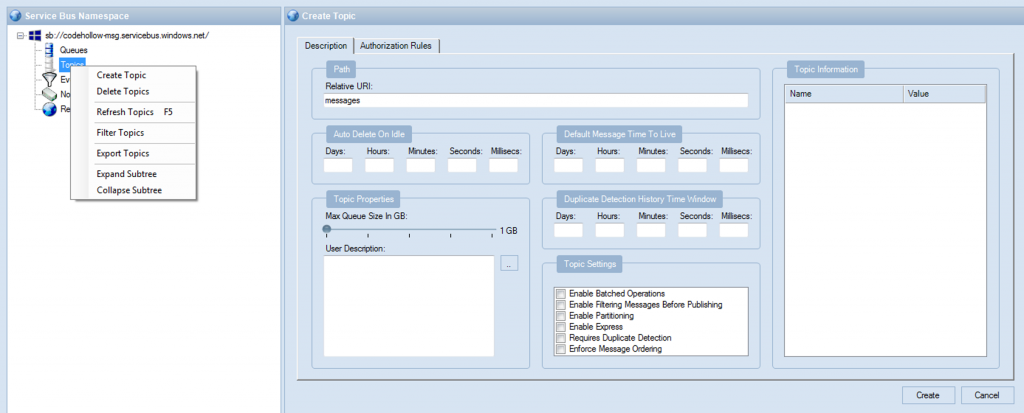
- Give it a relative URI like “messages” and click on “Create”:
- Create a new subscription under the newly created topic
- Give it name – e.g. “All” and set the Max Delivery Count to a useful number (1000)

- If you want to test and debug your servicebus, then I also suggest you to create a subscription for debugging purposes. This subscription holds messages for 1 hour and then it deletes those messages. You can create such a subscription by giving it a name like “Debug” and set “Default Message Time To Live” to 1 hour.
- Give it name – e.g. “All” and set the Max Delivery Count to a useful number (1000)


Send testdata (messages) to your ServiceBus
- Right click on the topic and click “Send Messages”
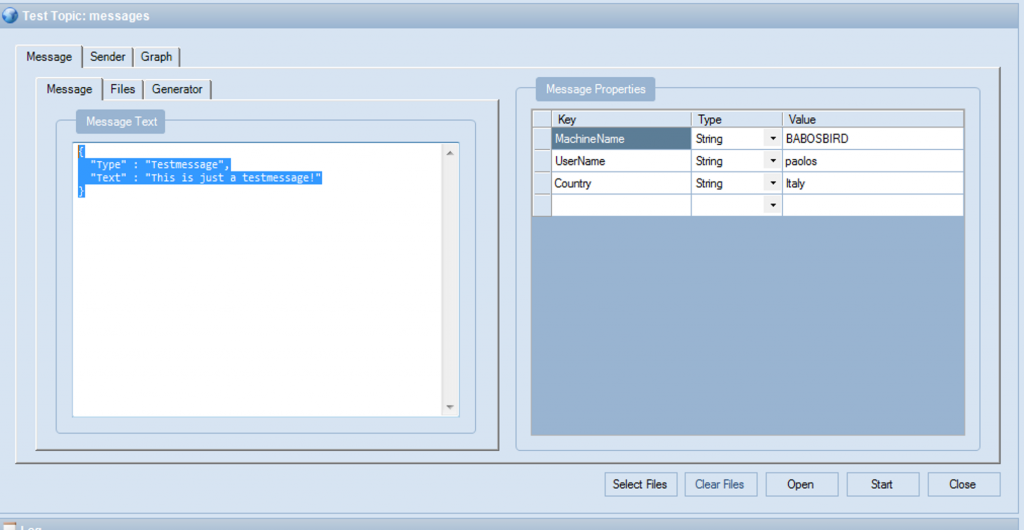
- Enter some data to the message text and to the message properties. In the “Sender” tab you can configure how much messages you want to send by clicking the “Start” button.
- Click “Start” to send messages to the servicebus.
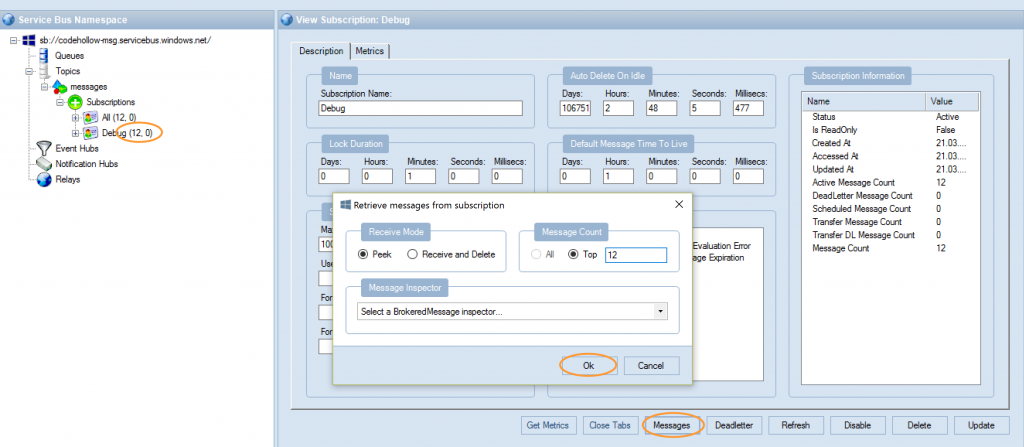
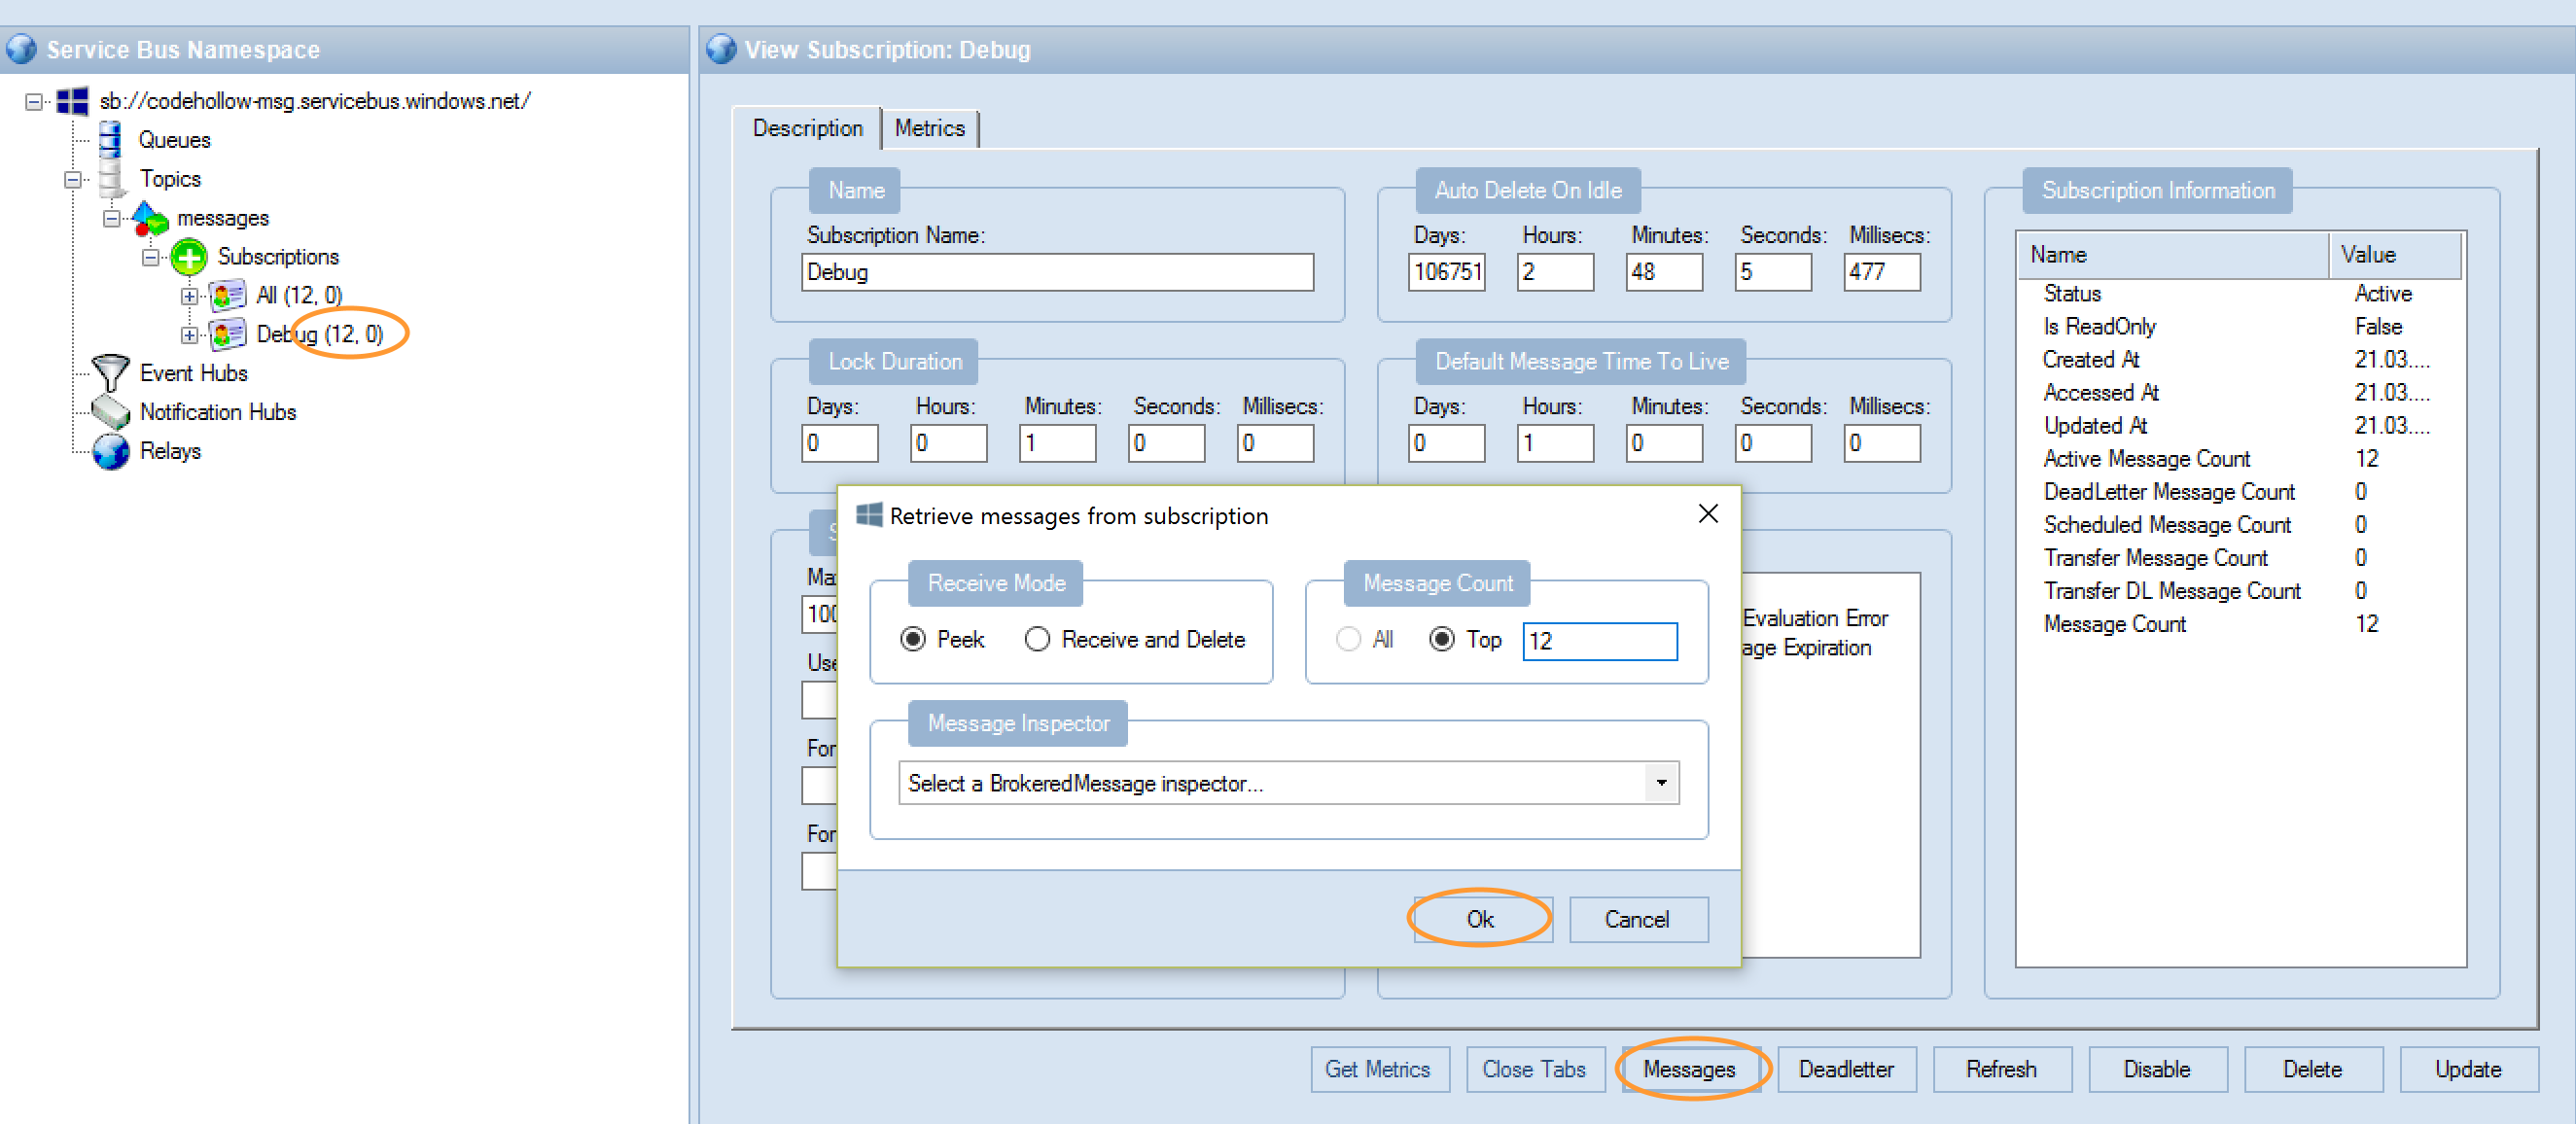
- Close the window and refresh the subscription
- You should now see that the number right to the subscription changed.
- Get the messages by selecting the subscription, click on Messages and peek some of them:

Additional information
How to use Service Bus topics and subscriptions: https://azure.microsoft.com/en-us/documentation/articles/service-bus-dotnet-how-to-use-topics-subscriptions/


Comments are closed